
Setup
Before starting the integration, complete all four setup steps in order. Each step must be finished before moving to the next.
Step 1: Enable Ocrolus services in MeridianLink
This step requires two actions: raising a support ticket with MeridianLink and enabling Ocrolus as a vendor in the MeridianLink Admin portal.
Raise a MeridianLink support ticket
Contact the MeridianLink support team with the Webhook URL, Username, and Password supplied by Ocrolus. In the same ticket, ask MeridianLink to:
- Configure the Ocrolus integration for the production environment using the credentials provided by the Ocrolus team. The Ocrolus Demo environment is not required.
- Whitelist the webhook URL provided by Ocrolus to enable event notifications and integration workflows.
TipThe support ticket process is handled independently by each client. The exact steps MeridianLink Support performs internally may vary. Follow any instructions MeridianLink provides during this process.
Step 1.1: Enable Ocrolus as a vendor
-
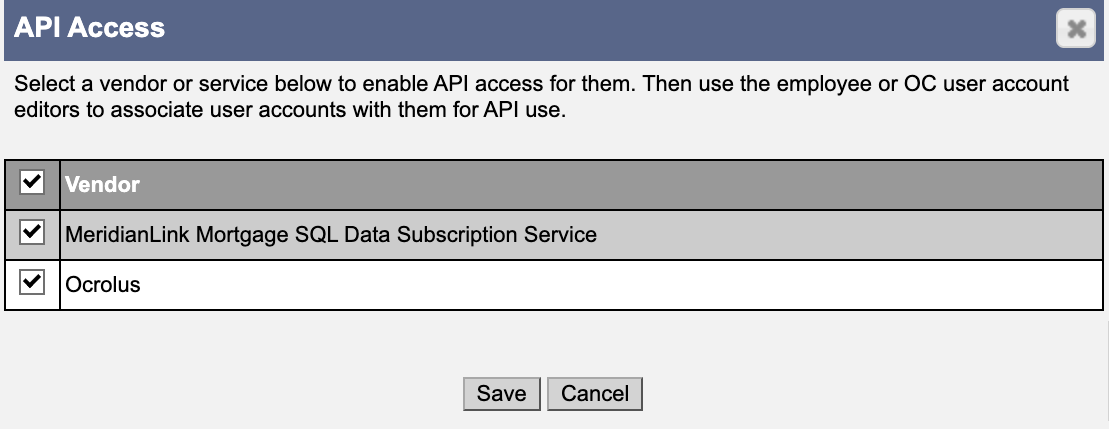
Go to Admin > Company Setup > General Settings > Services.
-
Click Configure API Access.
-
Check the box next to Ocrolus.
-
Click Save.
Step 1.2: Add credentials for Ocrolus
-
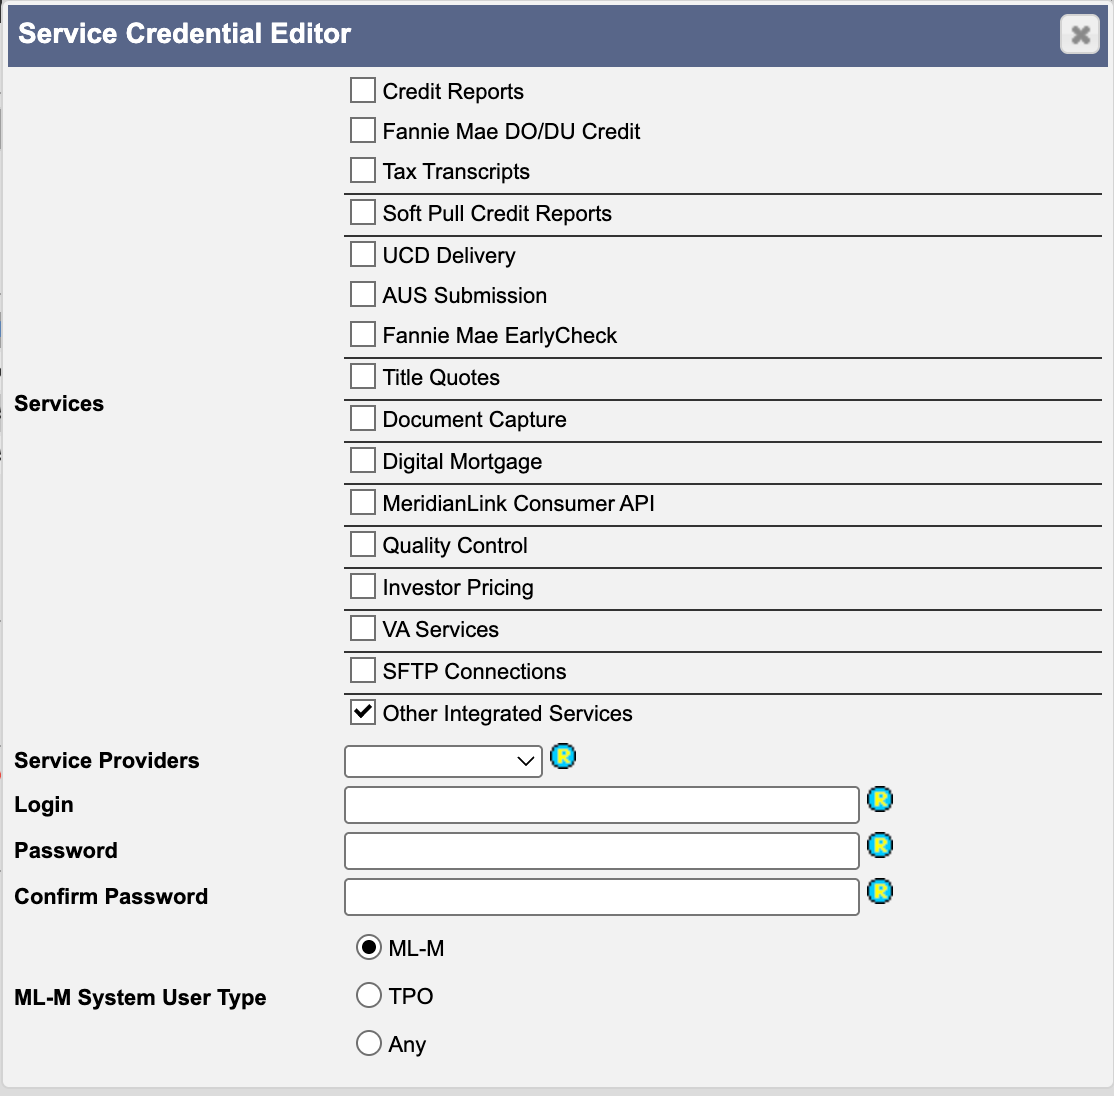
Go to Admin > Company Setup > General Settings > Services.
-
Click Add Credentials.
-
Enable the Other Integrated Services checkbox.
-
Add the Username & Password provided by Ocrolus.
-
Click Save.
Step 1.3: Enable API access for the user
On the Ocrolus user account:
- Allow accessing APIs
- Allow editing non-assigned loans
- Allow viewing eDocs
- Allow editing eDocs
ImportantWithout these permissions, the user and Ocrolus acting on behalf of that user cannot access the MeridianLink APIs, even if the steps above were completed. The user must also have access at the corporate level.
Step 2: Configure the MeridianLink event webhook
This step is required to enable automatic document ingestion when loan events occur in MeridianLink. The webhook must be configured in the MeridianLink Admin portal under Admin > Company Setup > Event Integrations.
To configure the webhook event, perform the following steps:
-
Log in to the MeridianLink Admin portal with an admin account.
-
Navigate to Admin > Company Setup > Event Integrations.
-
Create a new event integration and configure the webhook URL provided by
Ocrolus. For example.https://<environment-domain>/webhook.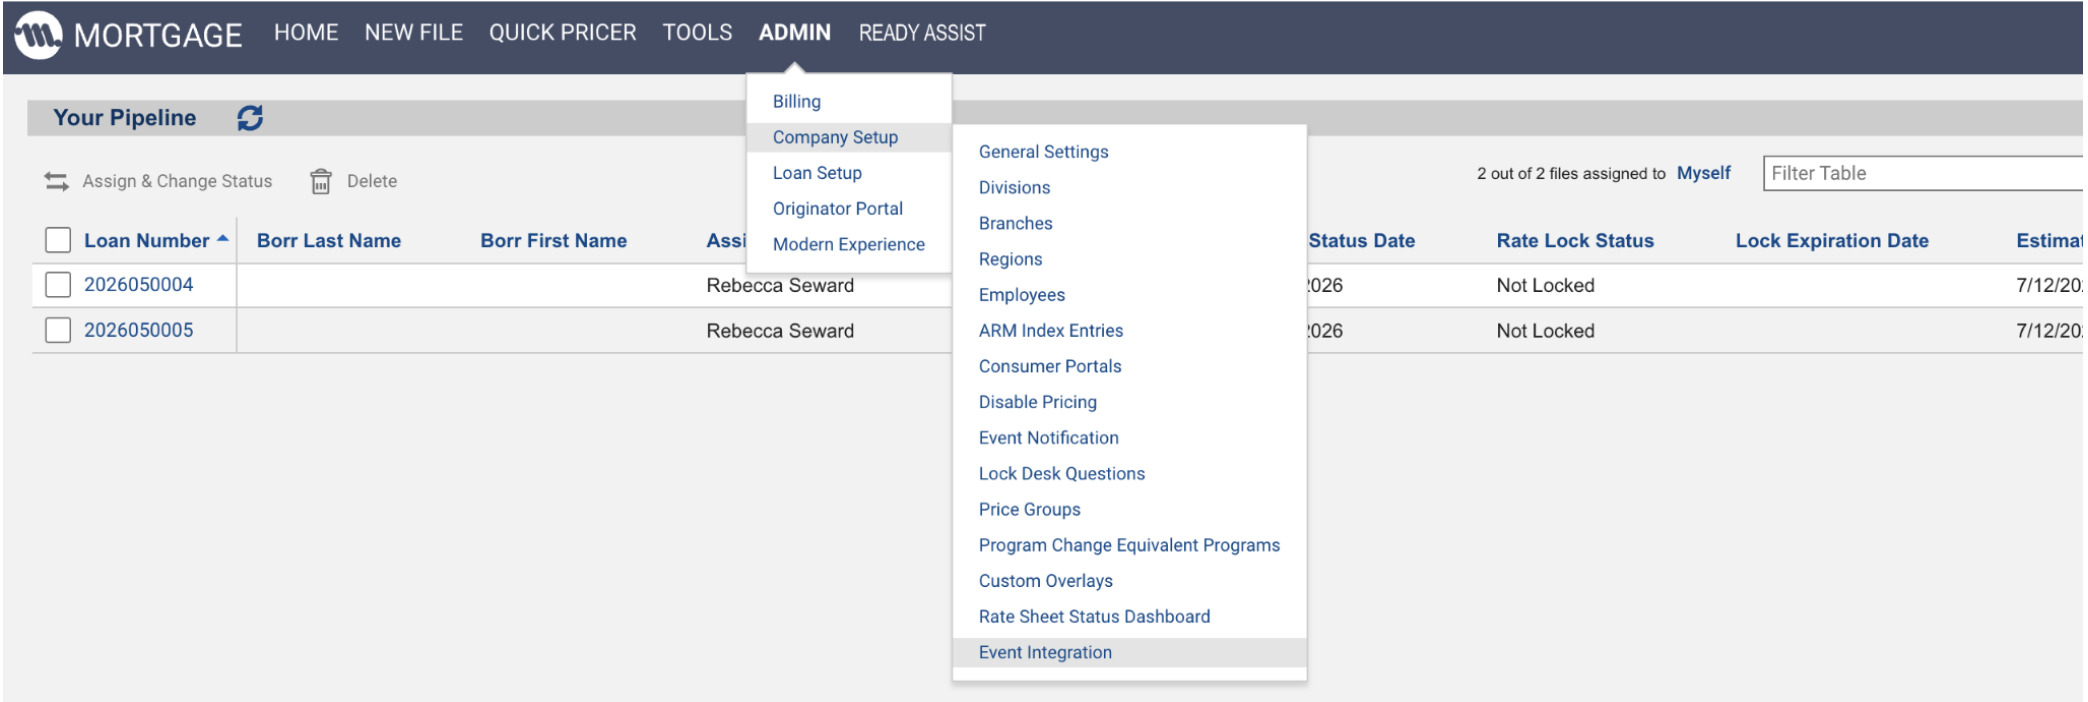
-
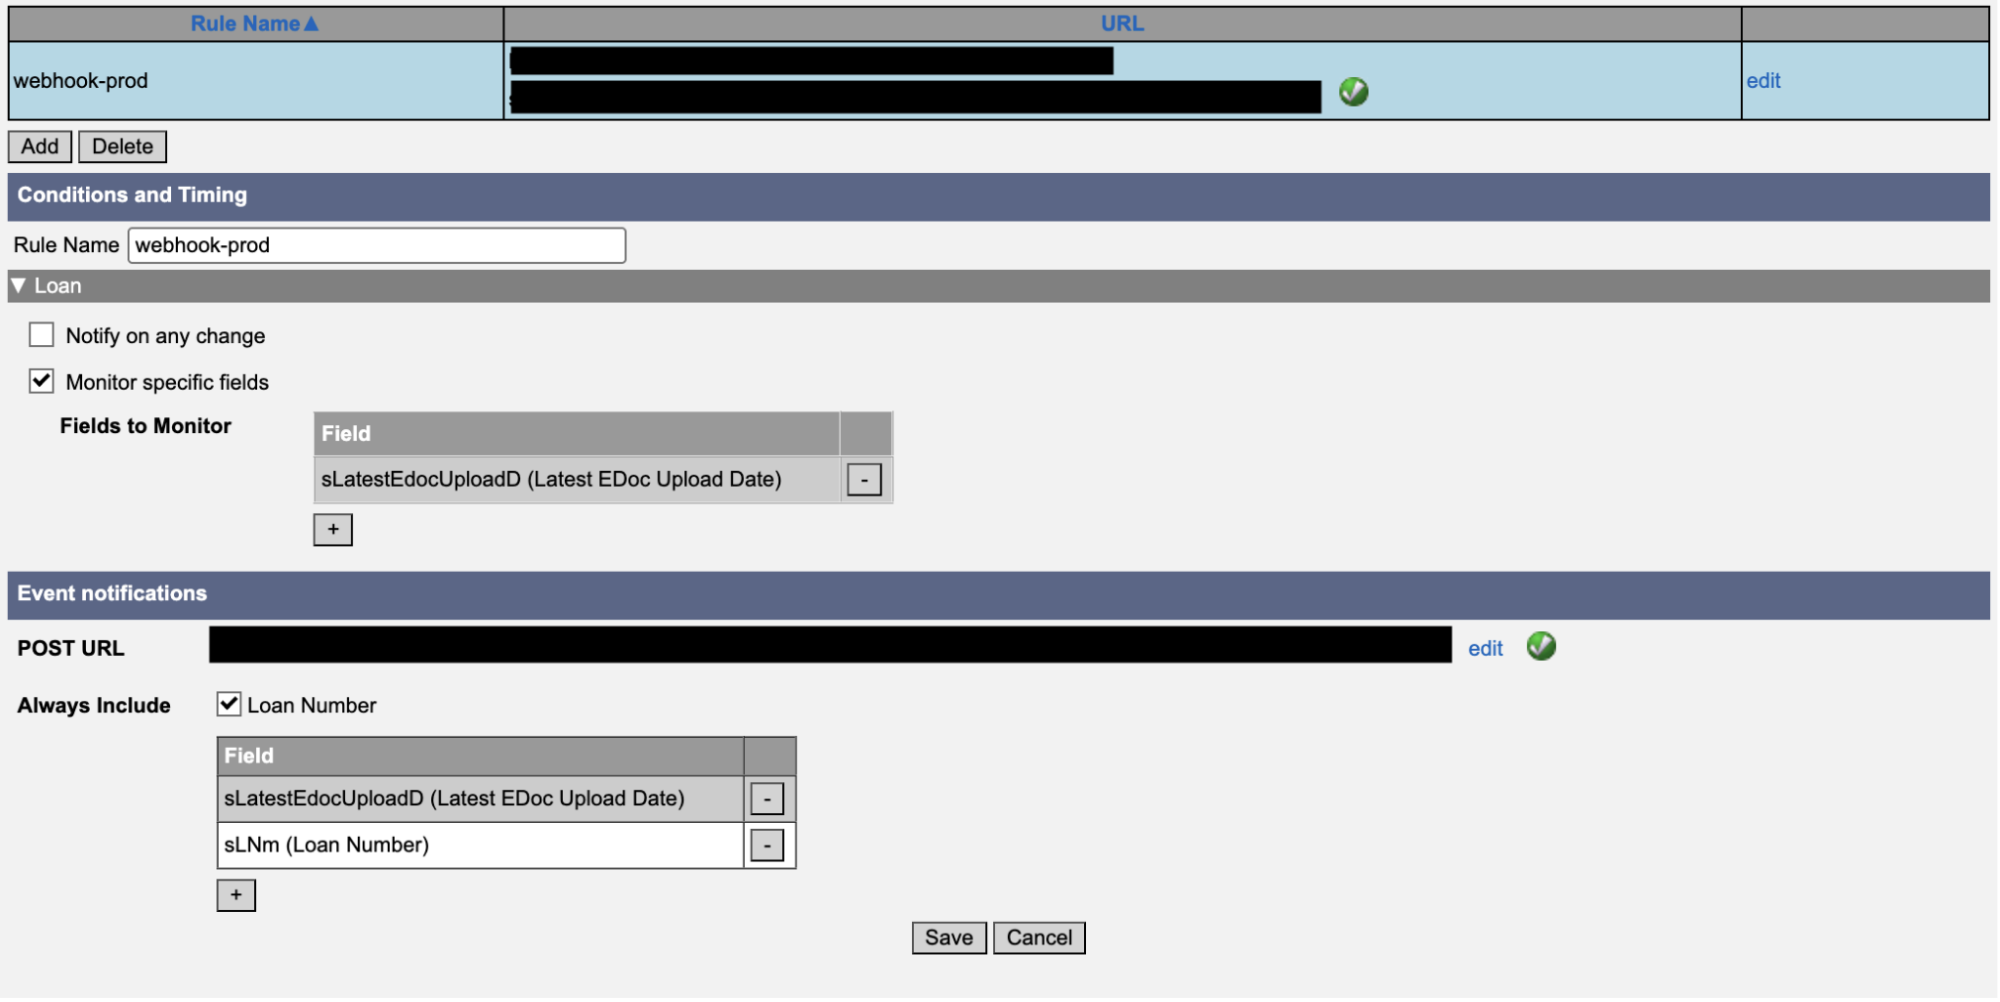
Select the loan and document fields that should trigger ingestion.
-
Save the integration configuration.
Production URL whitelisting
Before the production webhook can receive events, MeridianLink must review and whitelist the production URL. Submit a support request to MeridianLink requesting domain review and approval for the production webhook endpoint.
Step 3: Map Ocrolus users to MeridianLink users
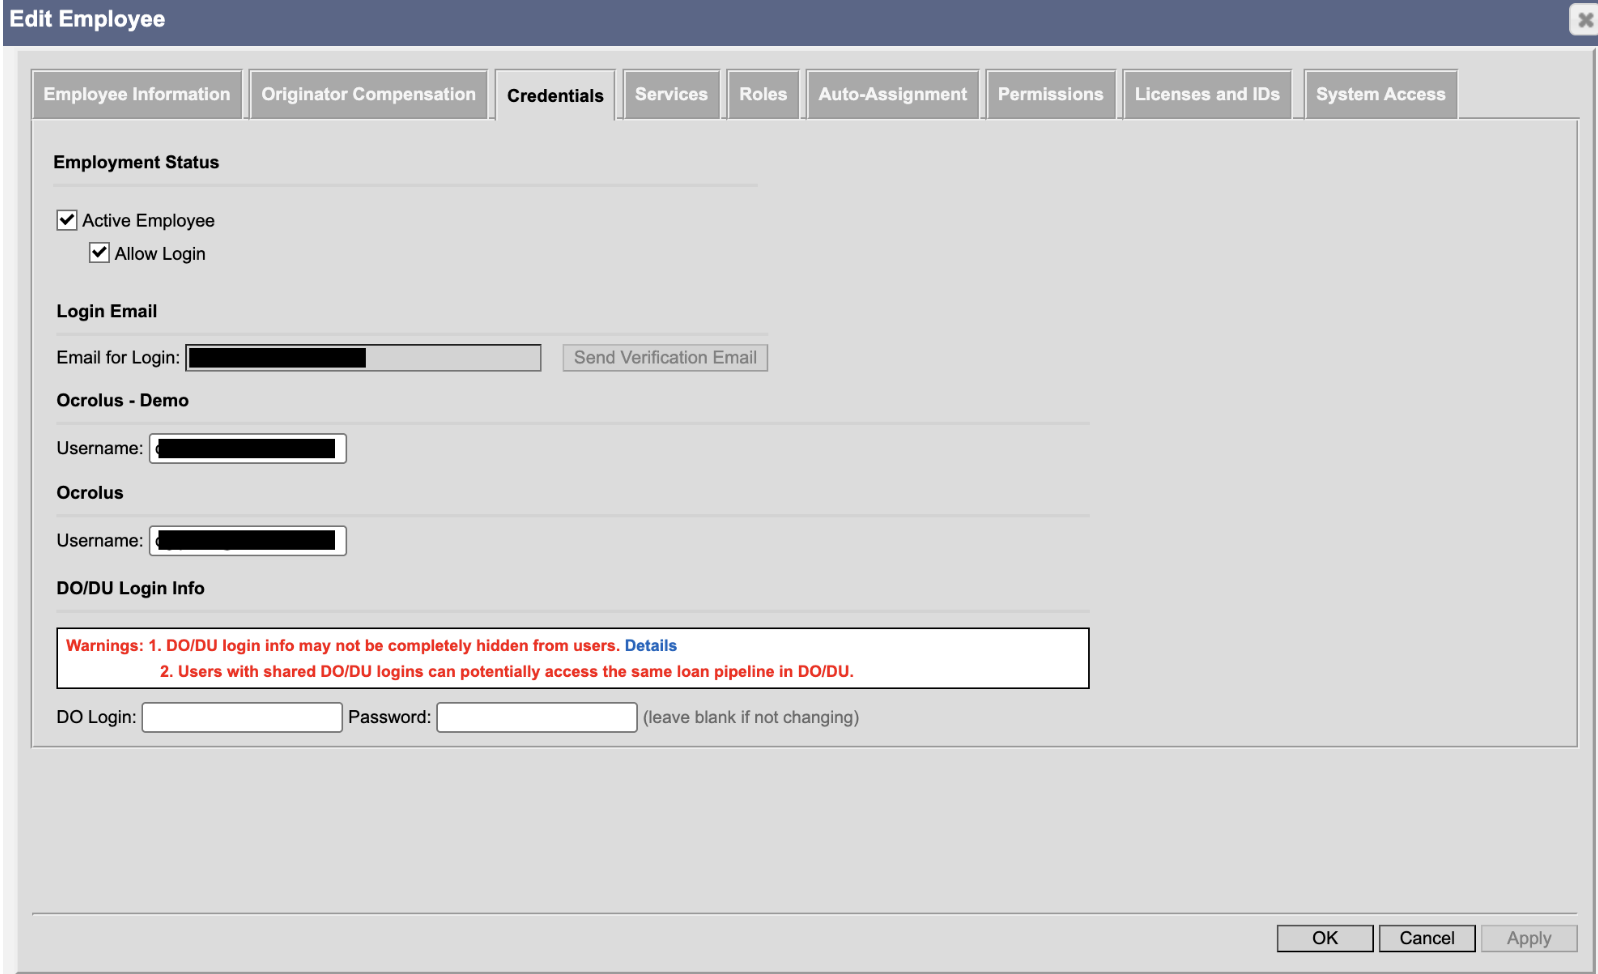
Each MeridianLink employee who will use the Ocrolus integration must be mapped to their corresponding Ocrolus account.
- Log in to the MeridianLink Admin portal with an administrator account.
- Navigate to Admin > Company Setup > Employees.
- Select an employee.
- Open the Credentials tab.
- Add the corresponding Ocrolus account email address for that employee.
- Click Save.
- Send the verification email to the new user from the Employees editor in MeridianLink Mortgage to complete their One Gateway login setup. This step is required for the new user's API credentials to authenticate successfully. Skipping it will result in OAuth token generation failures.
- Verify that the new API user account has all required API permissions enabled in MeridianLink. Missing permissions will also cause OAuth authentication to fail. Contact MeridianLink Support if any permissions are absent.
- Repeat these steps for every employee who will use the Ocrolus integration.
ImportantSending the verification email is required for the new user's API credentials to authenticate successfully. Skipping it results in OAuth token generation failures. Missing API permissions also cause OAuth authentication to fail. Contact MeridianLink Support if any permissions are absent.
NoteEvery MeridianLink user who accesses the Ocrolus integration must have their corresponding Ocrolus account email configured in the Credentials tab. This mapping allows Ocrolus to correctly associate actions with the appropriate MeridianLink user.
Step 4: Configure document folder mapping
Before the integration goes live, you must create the following two eDocs folders in your MeridianLink instance:
-
OCROLUS-PROCESSING-REQUIRED: This is the ingestion folder. Documents placed here are picked up and ingested by Ocrolus for processing. This is the designated entry point for all documents sent to Ocrolus.
-
OCROLUS-PROCESSED: This is a processed document folder. After Ocrolus processes and classifies the documents, the original source documents are moved to this folder by default. You must pre create this folder in MeridianLink before go-live. If the folder does not exist, MeridianLink may place the documents in UNCLASSIFIED.
NoteThis move behavior is configurable. If you prefer documents to remain in their original folder after processing, this can be turned off on request. Confirm the desired behavior during implementation.
Classification mapping process
- Retrieve the full eDocs folder list. Once the connection is established, pull all available eDocs folder locations from the MeridianLink instance.
- Run the AI mapping tool. Pass the eDocs folder list through the AI mapping tool, which automatically suggests mappings to Ocrolus-supported document types.
- Review and sign off. Share the proposed mapping, adjust any mismatches, and get sign-off before finalising.
For each document type, provide the following details:
| Requirement | Example |
|---|---|
| Source MeridianLink eDocs folder name | Income Documents |
| Expected Ocrolus form type | Paystub / Bank Statement / W2 |
| Destination MeridianLink eDocs folder name | Paystubs / Bank Statements / Tax Documents |
Example mapping
| Source folder | Classified as | Write-back folder |
|---|---|---|
| Income Documents | Paystub | Paystubs |
| Income Documents | Bank Statement | Bank Statements |
| Income Documents | W2 | Tax Documents |
Updated about 1 month ago