
Widget
Simplify financial data collection and accelerate underwriting with the Ocrolus widget.
The Ocrolus widget simplifies the collection of financial data for you by offering pre-built UI components and integration points, eliminating the need for custom API integration or extensive front-end development. With the widget, you can quickly start using Ocrolus to streamline your data collection process and accelerate underwriting.
Key features
- Built-in document ingestion that seamlessly connects with Ocrolus.
- Responsive design for optimal display on any device or screen size.
- Extensive customization options through Ocrolus's Dashboard allow you to match the widget's appearance to your website.
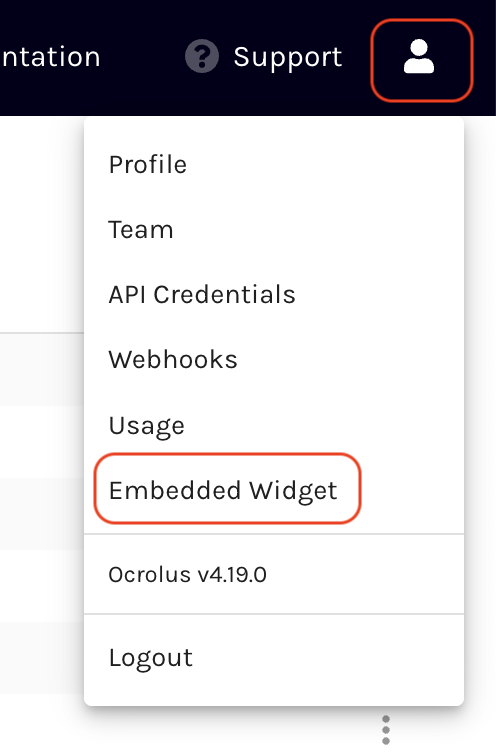
To view the widgets, navigate to the widget section within the Ocrolus Dashboard and access the Widget page by selecting the Embedded Widget option from the Account dropdown. On this page, you can create new widgets and efficiently manage all your existing ones. A convenient list of widgets will be displayed, providing easy oversight and control.
Create a widget
To create and configure your widget to align with your branding preferences, perform the following steps:
-
Go to Dashboard > Account & Settings > Embedded Widget.
-
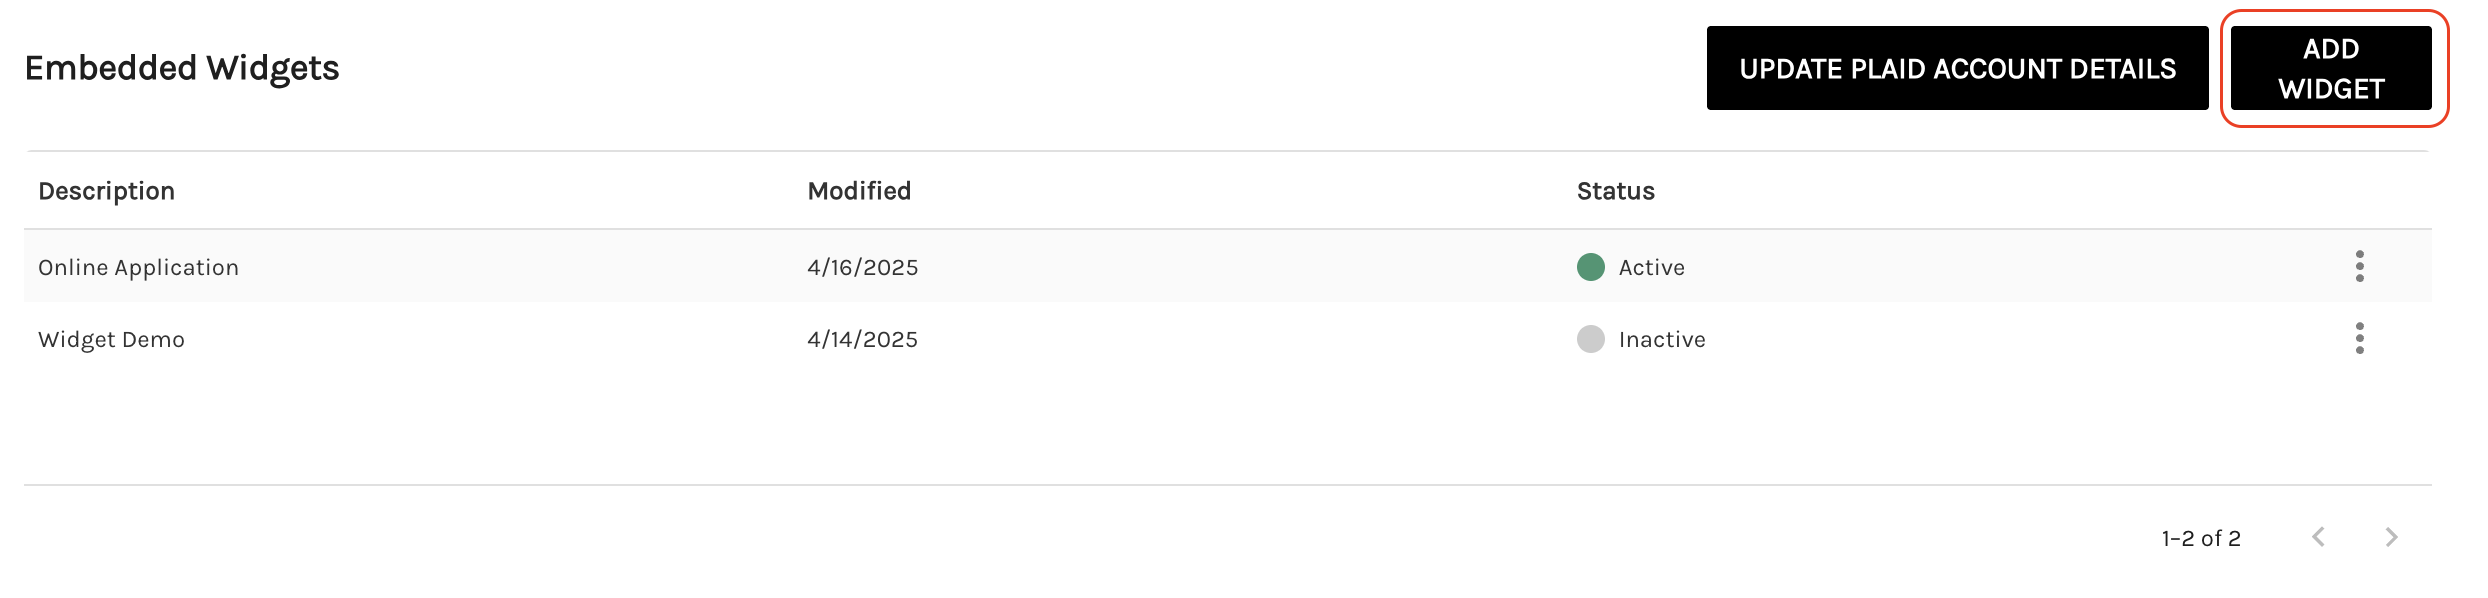
On the Embedded Widgets page, select the ADD WIDGET button to access the configuration page.
-
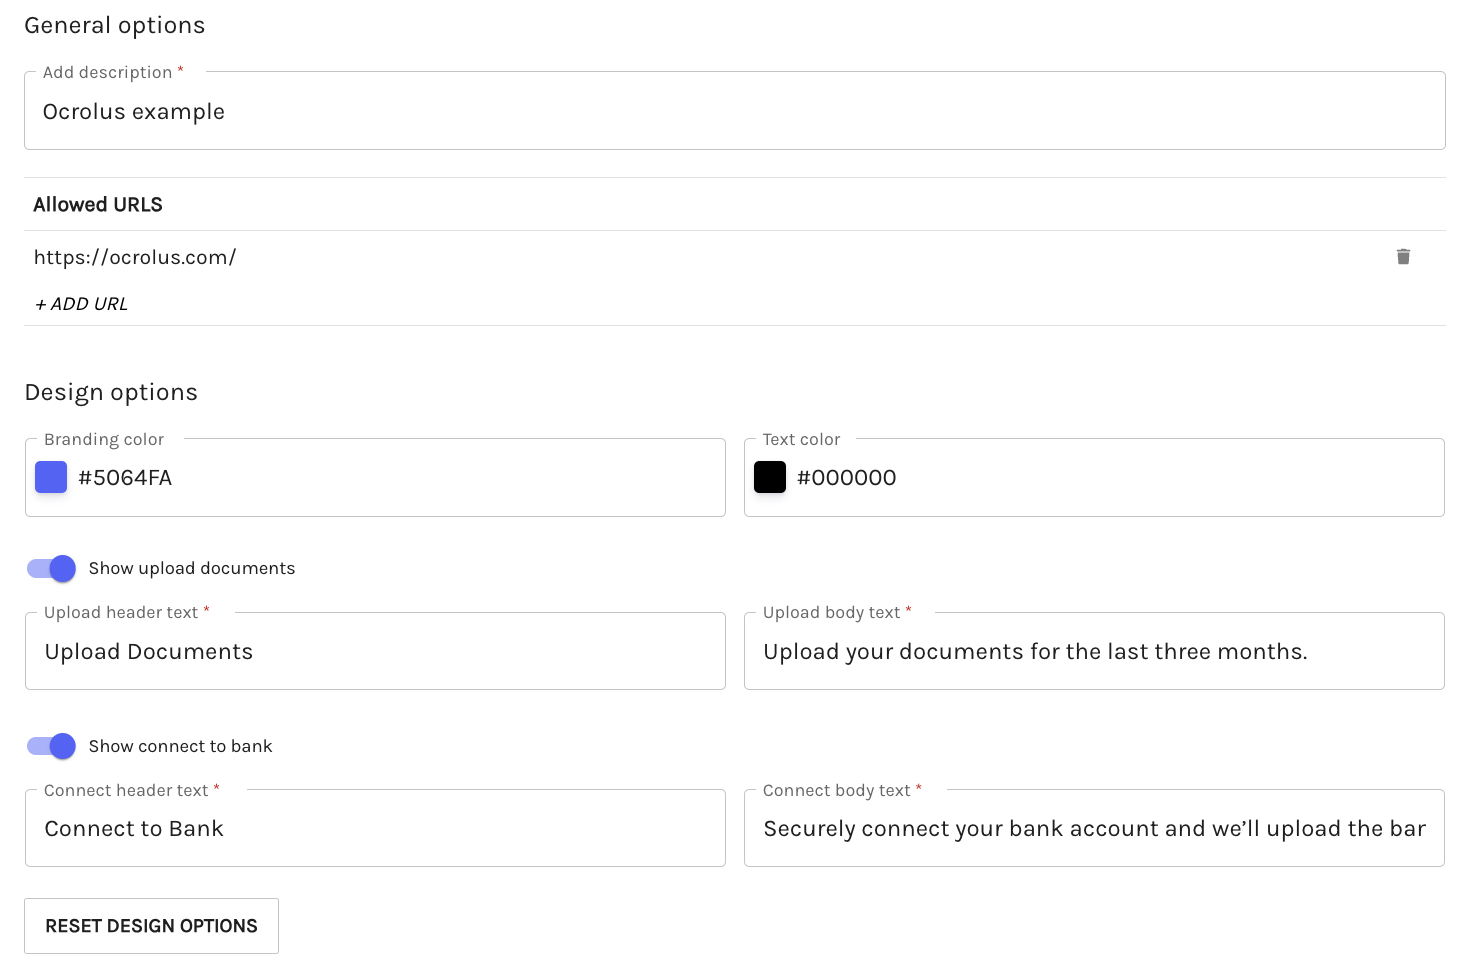
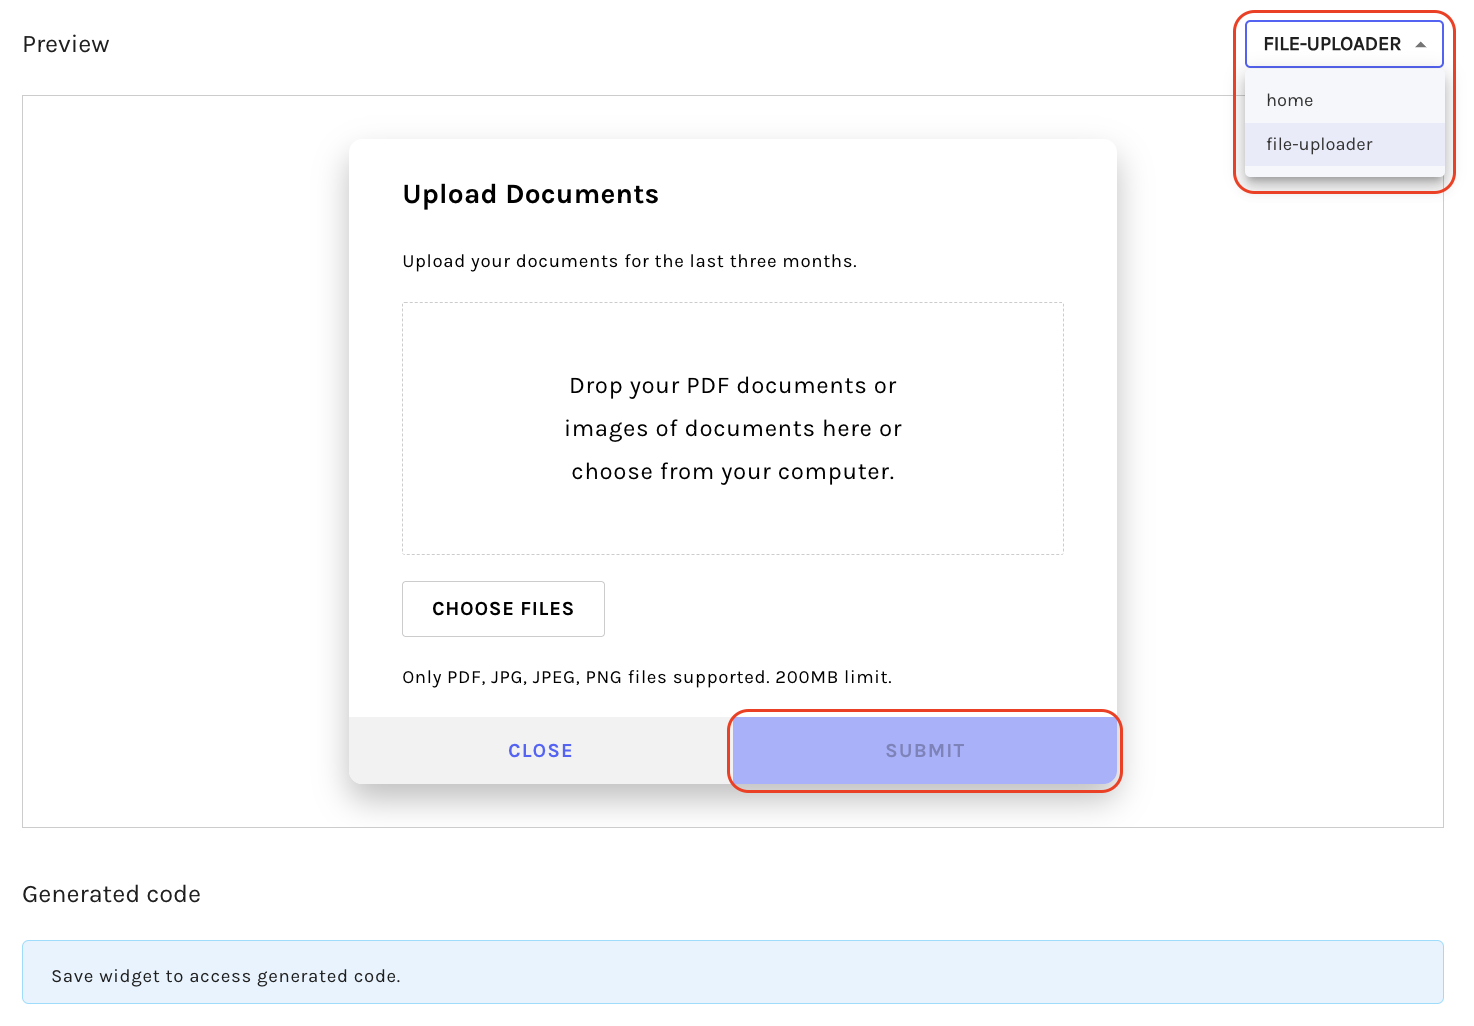
On the Add Widget page, add the URL of your desired hosting location to the allowed URLs list for the widget. Customize your website with branding colors, text colors, and displayed text. Validate your changes in the real-time preview window.
If the Show upload documents and Show connect to bank radio buttons are enabled, the home section appears by default. In this section, you can either upload documents from the past three months or securely connect your bank account, allowing Ocrolus to automatically fetch and upload your bank statements.
TipEnsure that at least one of the two toggles, Show upload documents or Show connect to bank is enabled. Don't turn off one option unless the other is enabled.
-
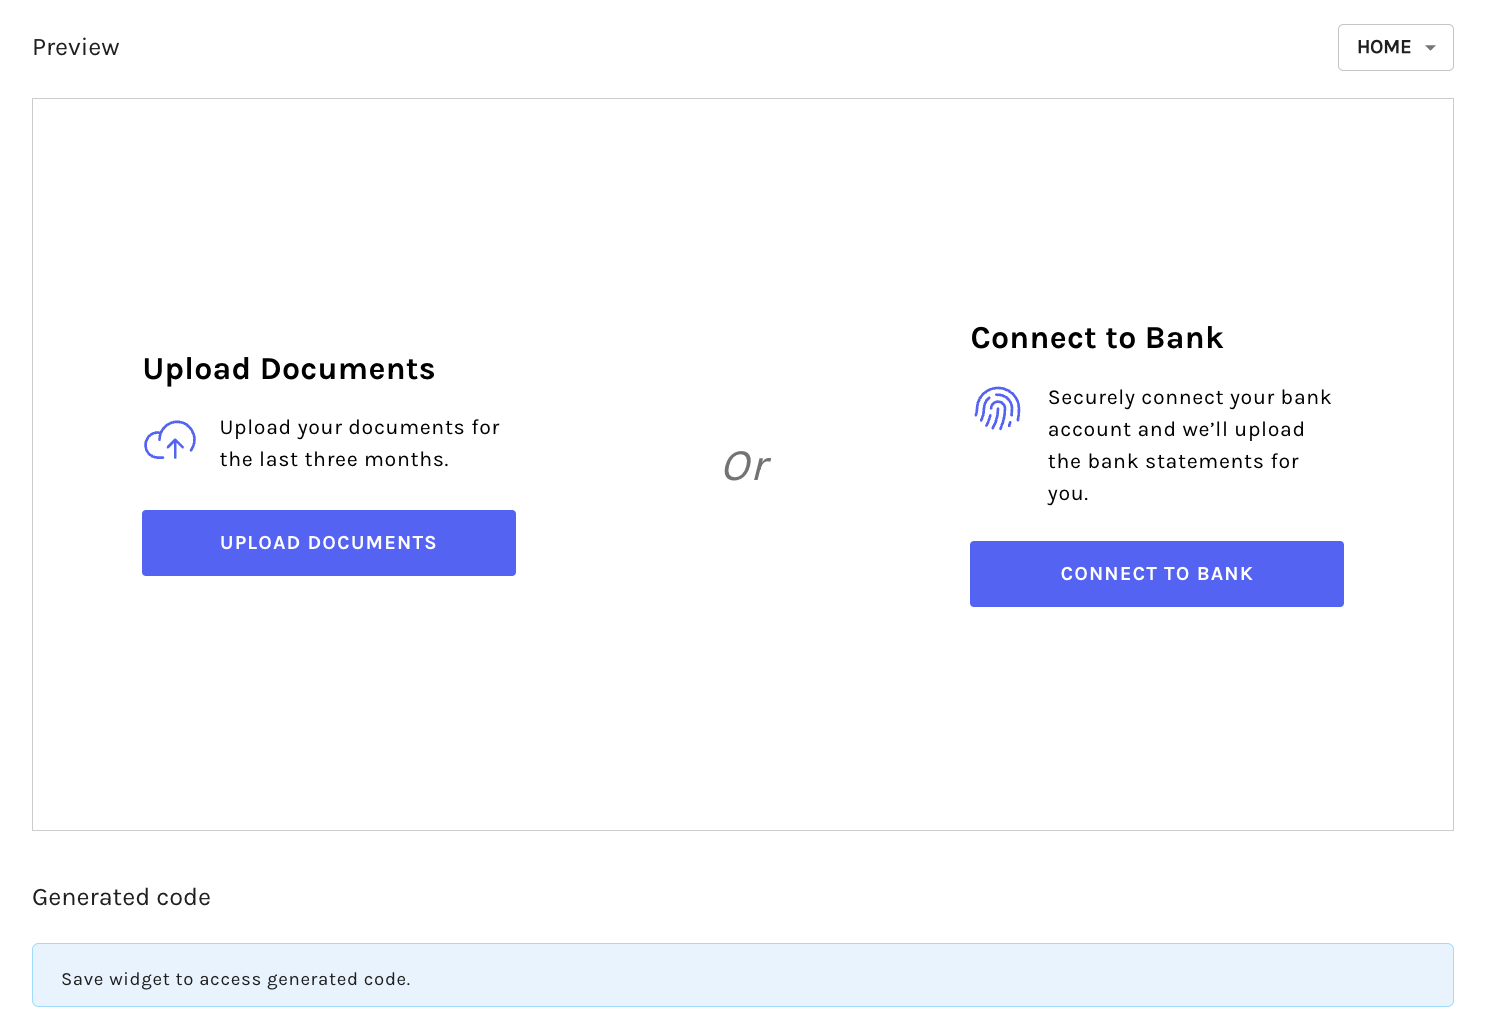
From the dropdown menu in the Preview section, select the file-uploader option. The Upload Documents pop-up appears. Upload your file and select the SUBMIT button.
-
From the top right corner of the Add Widget page, select SAVE. A widget is created successfully and is ready for embedding. To learn more about embedding a widget, see the Embed a widget section.
Embed a widget
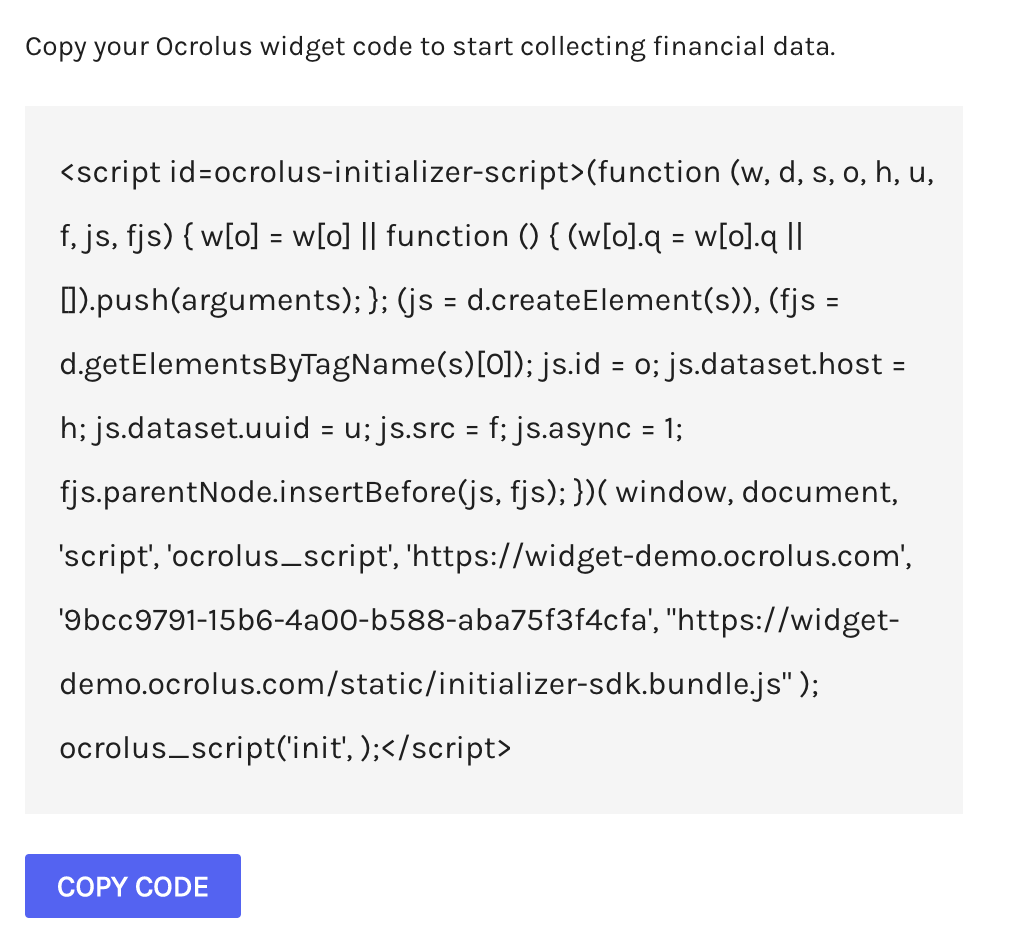
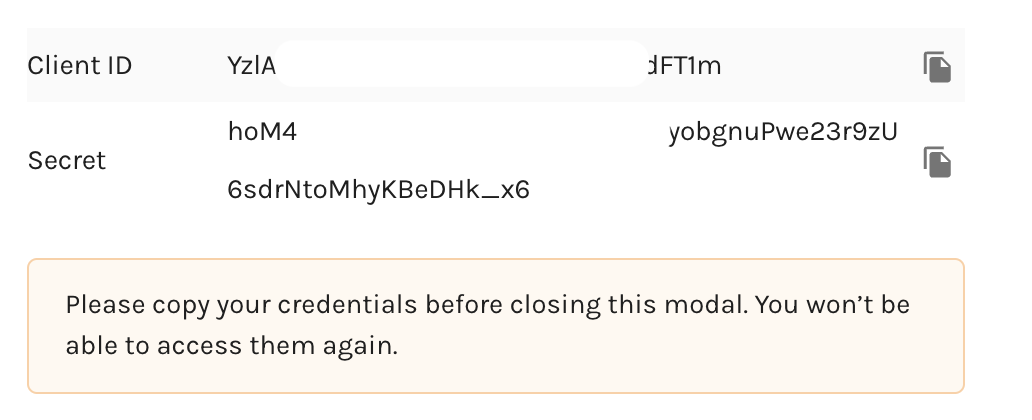
After the widget is created, the system generates the corresponding JavaScript code, the widget’s client ID, and secret to embed it on your website. Remember to copy and securely save these credentials as they won't be accessible later.
To embed the widget on your website, perform the following steps:
-
To embed widget requests, you'll need to authorize widget requests and set up a REST server that can handle internet requests. This includes configuring an endpoint on your server, as demonstrated in the JavaScript example, where a POST request is made with authenticated user information to request an authenticated token from Ocrolus for uploading purposes.
app.post('/token', function (request, response) { const user_token = request.headers.authorization || 1234 return getUserExternalId(user_token).then(userId => { return POST_REQUEST(https://jwe-issuer.ocrolus.net/token', { client_id: OCROLUS_CLIENT_ID, client_secret: OCROLUS_CLIENT_SECRET, external_id: userId, //If you want to upload additional files at a later point, you can use this external_id for reference grant_type: 'client_credentials', name: bookName, //To customize a book name, pass your desired name into this field }).then(token_response => { const token = token_response.access_token response.json({ accessToken: token }) }) }) }) -
Create a global
getAuthTokenmethod that utilizes the API server endpoint on your server and makes it accessible to the widget for seamless request handling.window.getAuthToken = async function() { const response = await fetch("https://www.yourserver.com/token", { method: "POST"}) const json = await response.json() return json.accessToken } -
Create the anchor div for embedding the widget, and add an element to your website with the id
ocrolus-widget-frame. The widget will dynamically populate this div with an iframe. Customize the size of this div according to your preferences, and the widget will automatically adjust to fit within it.<div id="ocrolus-widget-frame"></div> -
Embed the widget into your website by placing the generated JavaScript snippet in either the footer or header of your website. Please note that the example below is provided for explanatory purposes and should not be directly copied.
Notes:- By setting up webhooks, you can receive notifications whenever files are uploaded through the Ocrolus widget. For more information about the available events, please refer to our guide.
- You can retrieve the uploaded files by making a request to the Ocrolus download file endpoint.
- To see a complete example with all steps implemented, visit the Ocrolus widget quickstart page.
<script id=ocrolus-initializer-script>
(function (w, d, s, o, h, u, f, js, fjs)
{ w[o] = w[o] || function () { (w[o].q = w[o].q || []).push(arguments); };
(js = d.createElement(s)), (fjs = d.getElementsByTagName(s)[0]);
js.id = o; js.dataset.host = h; js.dataset.uuid = u; js.src = f;
js.async = 1; fjs.parentNode.insertBefore(js, fjs); })
(
    window,
    document,
    'script',
    'ocrolus_script',
    'https://widget-demo.ocrolus.com',
    'd547fb8f-ba6d-4f75-972e-4944a766e5d0',
    "https://widget-demo.ocrolus.com/static/initializer-sdk.bundle.js"
);
ocrolus_script('init', );
</script>
Connect your Plaid account with the Ocrolus widget
The Ocrolus widget seamlessly supports Plaid and allows lenders to configure Plaid Client ID and Client Secret directly from the Embedded Widget section in the Dashboard.
To enhance security and streamline key management, the Ocrolus widget allows you to securely store and manage Plaid API keys directly from the Embedded Widget section in the Dashboard. Instead of manually handling API credentials, you can configure Plaid keys in a controlled and secure environment, leading to reduced exposure risks while ensuring compliance.
Configure Plaid keys in the widget
To securely set up your Plaid keys, perform the following steps:
-
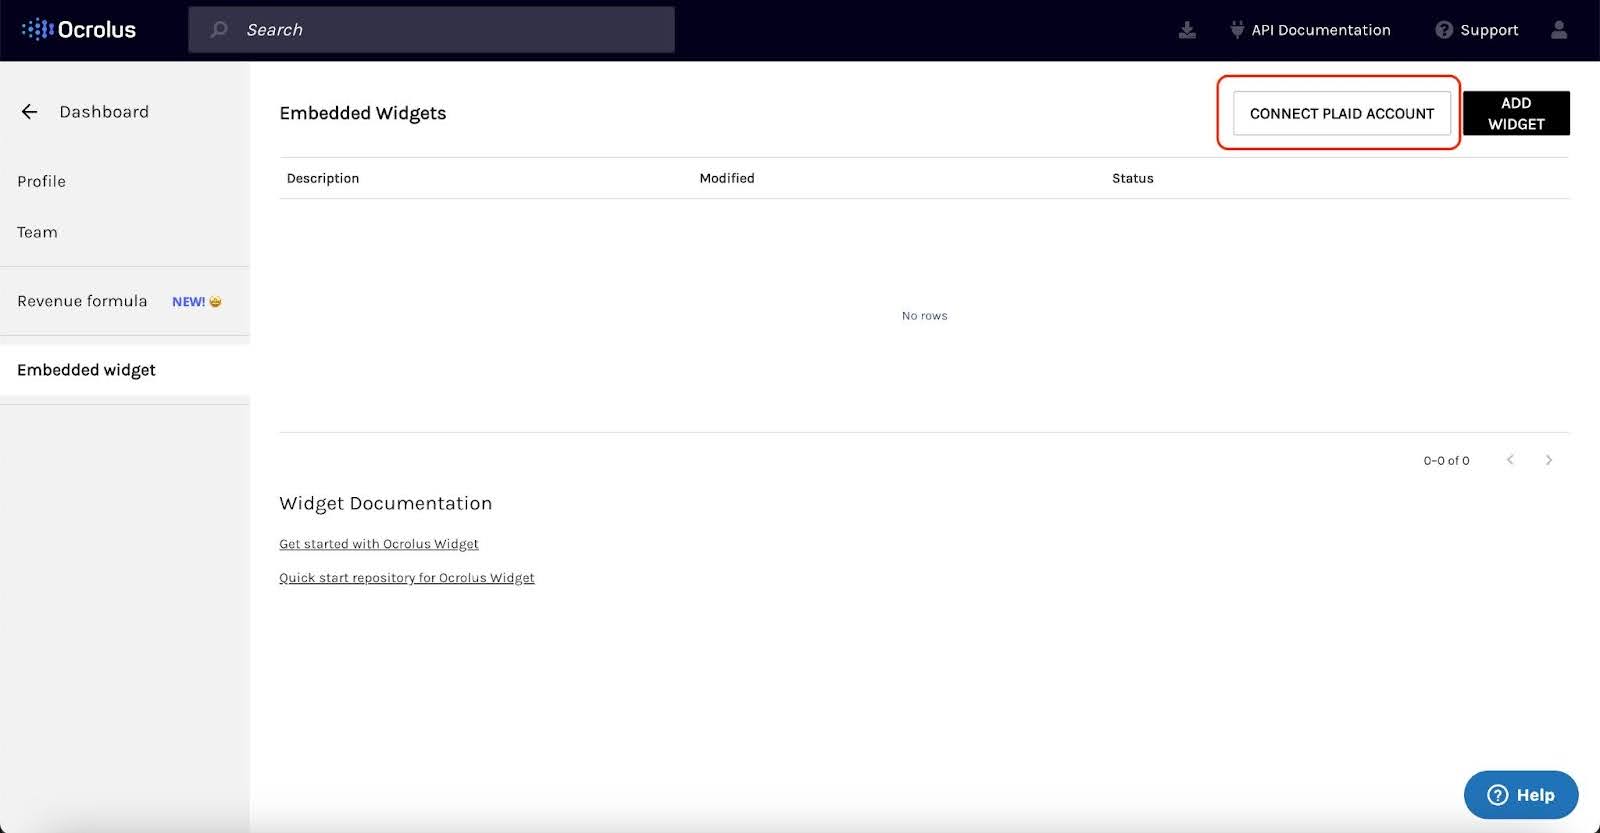
Navigate to Dashboard > Account & Settings > Embedded Widget.
-
If this is your first time connecting Plaid, click CONNECT PLAID ACCOUNT, or if you've already connected Plaid and need to update credentials, click UPDATE ACCOUNT DETAILS.

-
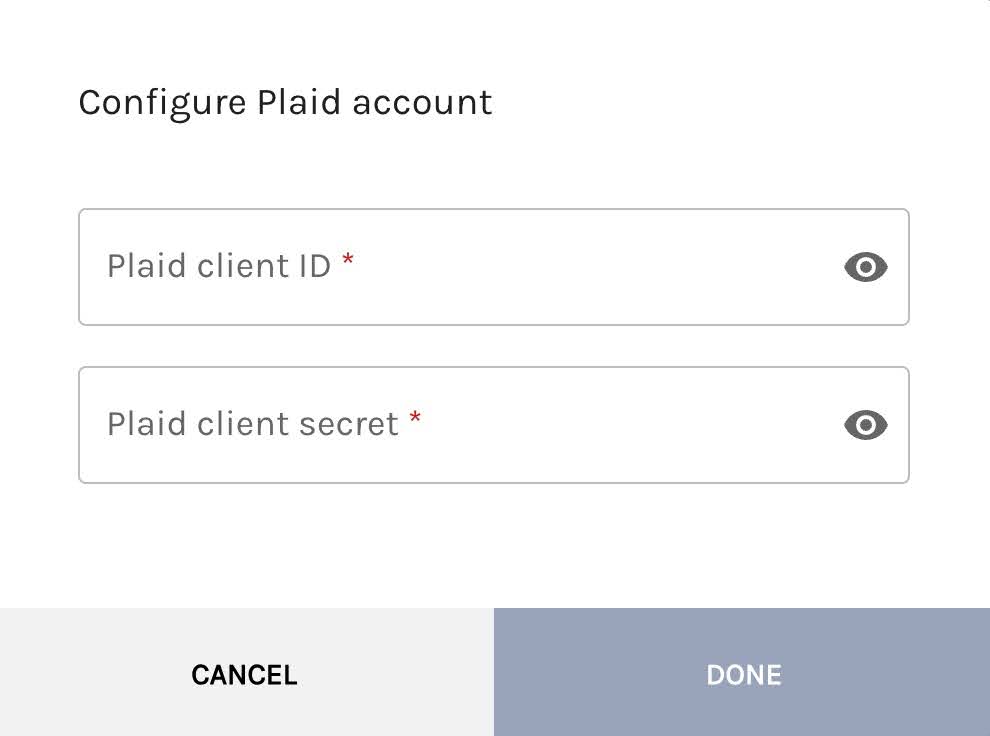
Log in to your Plaid Dashboard, retrieve your Plaid Client ID and Plaid Client Secret (Production) then copy and paste these keys into their respective fields in the Configure Plaid Account pop-up.
-
Click Done to save the keys securely. Success! Your Ocrolus Widget is now connected to your Plaid account, enabling automatic financial data retrieval. You can now enable Plaid’s Connect to Bank option from the widget settings.
Enable Plaid integration
This option allows you to connect your bank account to the Ocrolus Widget, enabling Ocrolus to securely access and retrieve your financial data directly from your bank. By establishing this connection, Ocrolus can automatically fetch the necessary bank statements, streamlining the document upload process and ensuring accurate data collection.
Prerequisites
Before enabling Plaid integration in the widget, ensure your account is already connected to the Ocrolus widget. If it hasn't been connected yet, complete the steps outlined in the Connecting your Plaid account with the Ocrolus Widget section before continuing.
Procedure
To enable Plaid integration in the Ocrolus widget, perform the following steps:
-
Go to Dashboard > Account & Settings > Embedded Widget.
-
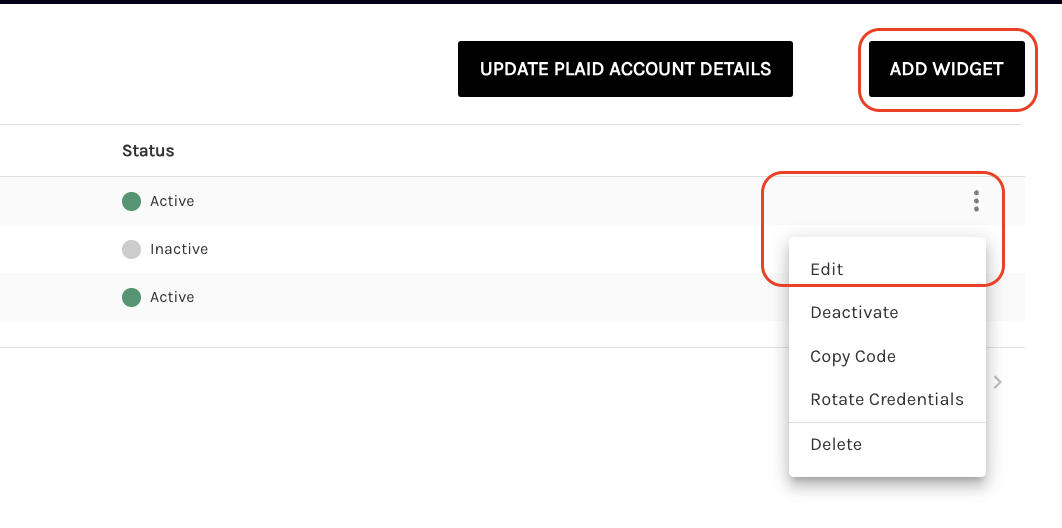
On the Embedded Widgets page, select the Edit option for an existing widget, or choose the ADD WIDGET option to create a new widget. To select the Edit option, click on the more options (three vertical dots) and then select Edit.
-
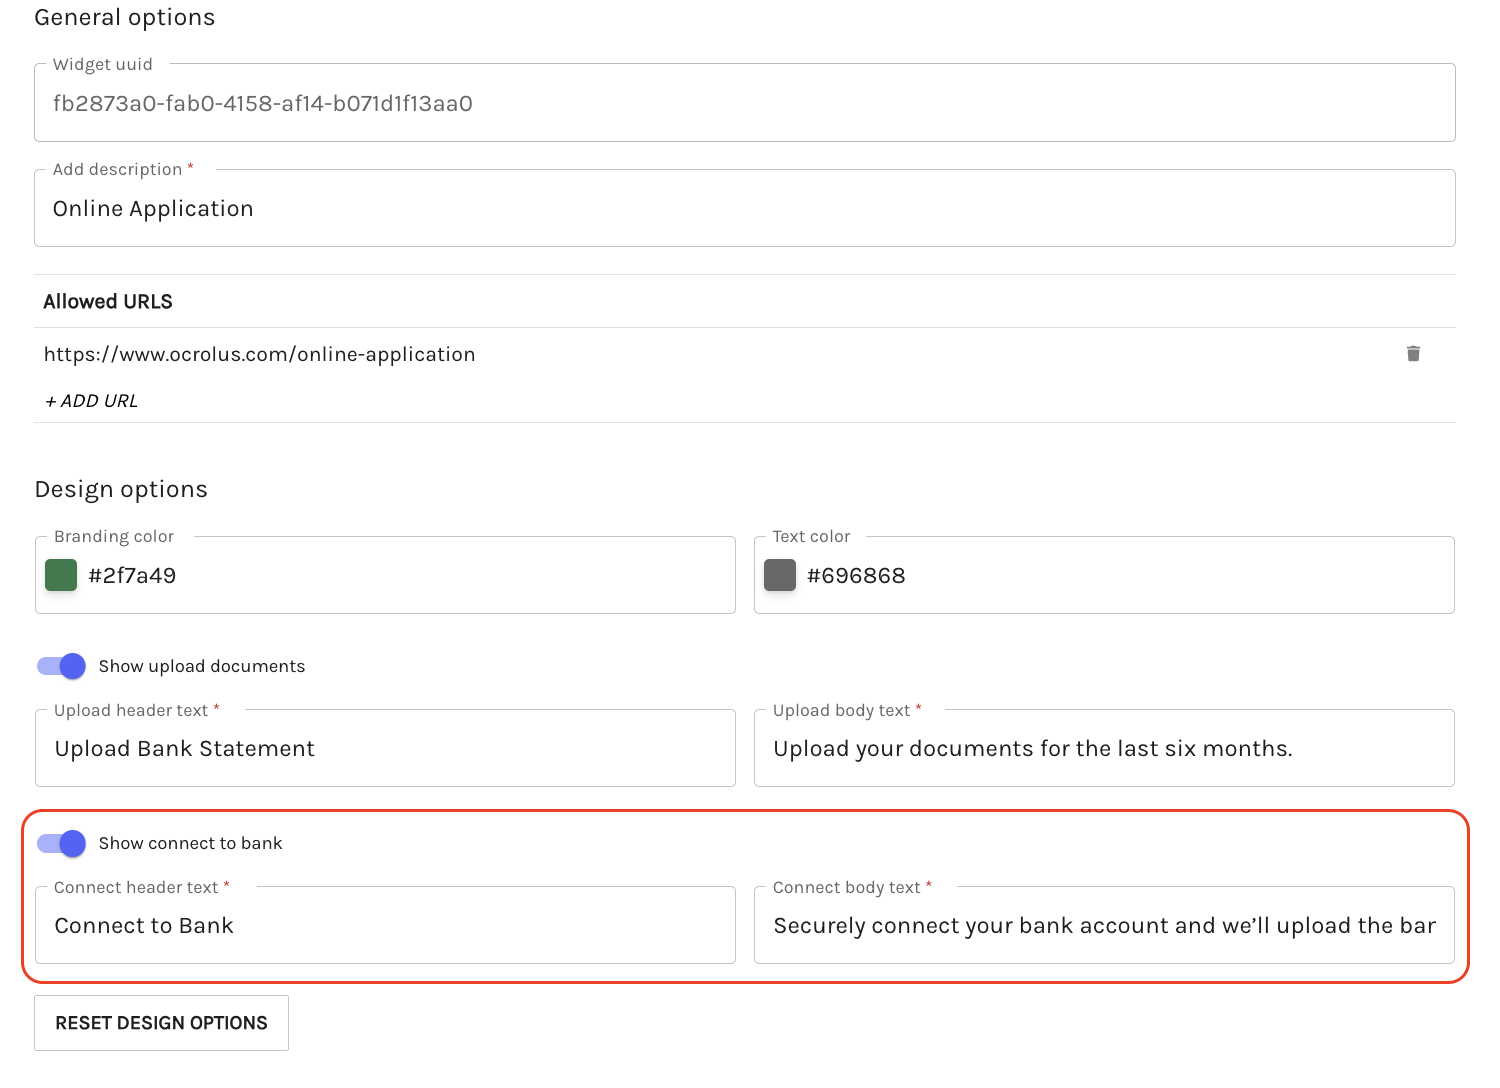
Turn ON the Show connect to bank toggle. This securely connects your bank account, allowing Ocrolus to automatically fetch and upload your bank statements.
-
Select Save to apply your changes. Your Ocrolus widget is now fully integrated with Plaid.
Enable document upload
The Ocrolus widget enables borrowers to upload their bank statements directly through the widget interface. This feature can be enabled or disabled as needed to allow your organization to customize the widget functionality based on specific requirements.
Procedure
To enable document upload functionality, perform the following steps:
-
Go to Dashboard > Account & Settings > Embedded Widget.
-
On the Embedded Widgets page, select the Edit option for an existing widget, or choose the ADD WIDGET option to create a new widget. To select the Edit option, click on the more options (three vertical dots) and then select Edit.
-
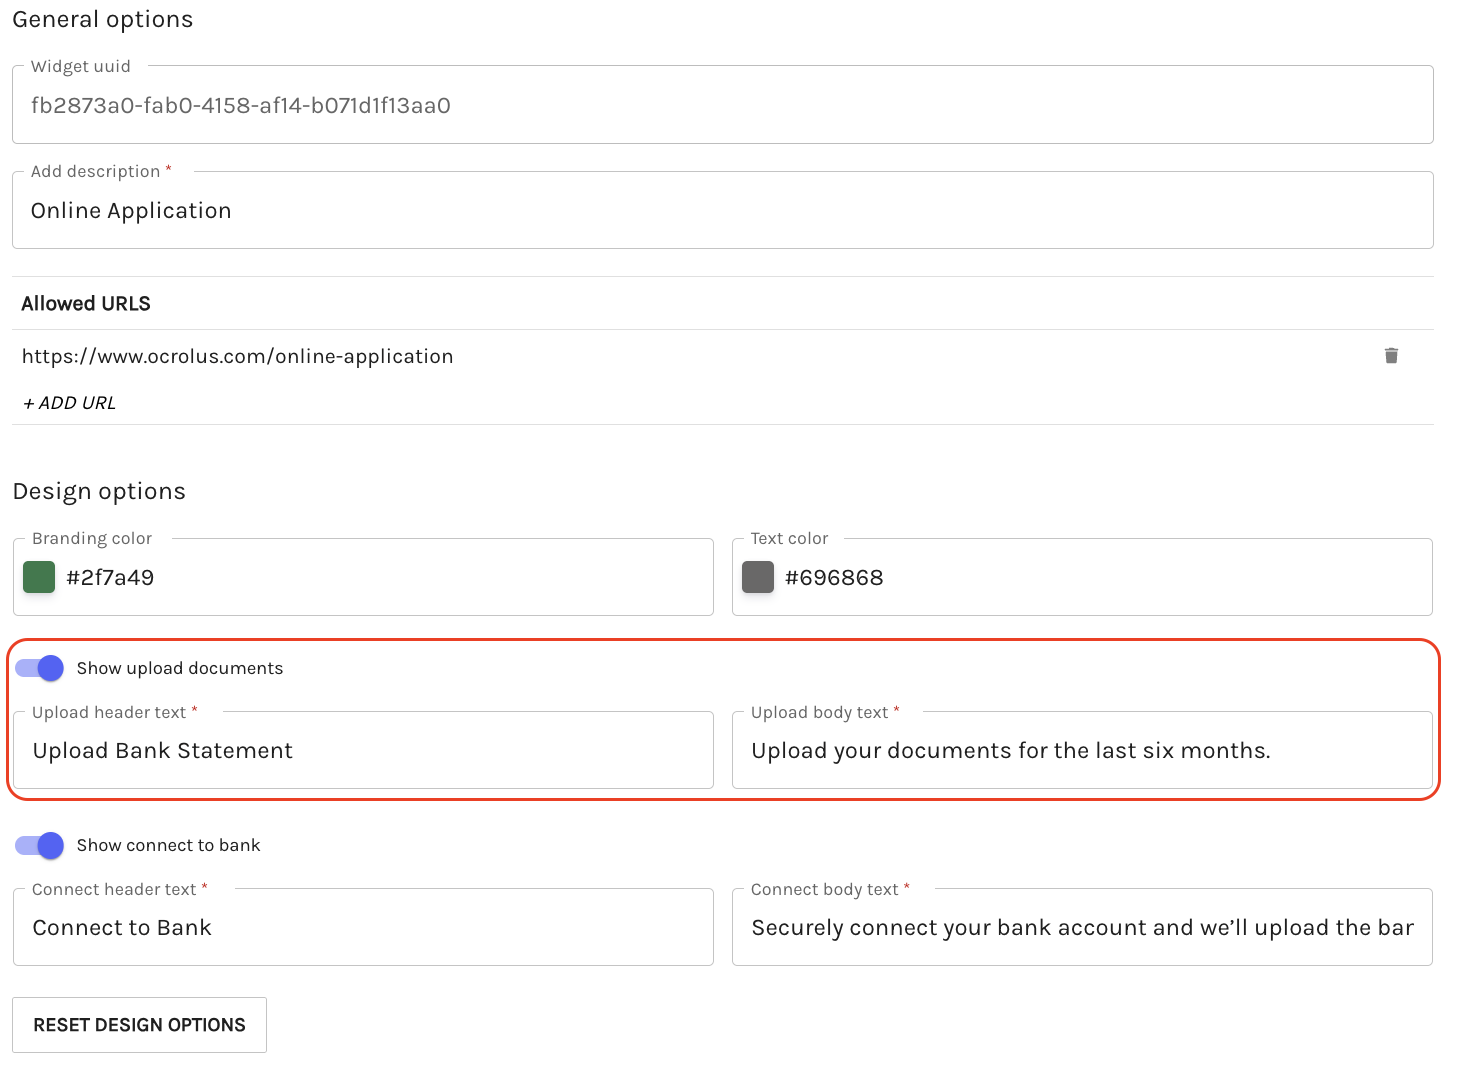
Turn ON the Show upload documents toggle. This will enable the upload functionality.
-
From the top right corner of the Add Widget page, select SAVE.
Updated 2 months ago