
Setting up Encompass Support
Here's what you need to use Ocrolus and Encompass together.
Ocrolus helps lenders accelerate mortgage decisions by streamlining document-driven workflows and validating data. With our Ocrolus plugin for Encompass, data validation is made easy thanks to document classification and capture capabilities that streamline your loan processing workflows. You don't even have to write any code!
In this guide, we’ll walk you through the process of connecting Ocrolus to your Encompass instance. We'll start by providing Ocrolus with the necessary credentials. After that, we'll create an Ocrolus persona within Encompass that has the permissions it needs. Then we'll create a user with that persona assigned. Finally, we'll install the custom forms that underpin our Analyze features.
Connecting with Ocrolus
First and foremost, you'll need to ensure that Ocrolus has permission to access your data in Encompass. Here are the steps for that:
- Provide your account executive with your Encompass client ID (e.g. 30112...) and instance ID (e.g. BE112...).
- We'll use this information to request API credentials for Encompass on your behalf. This may take a few business days.
- Once we have the Encompass credentials ready, we'll pass them along to you. The rest of this guide explains what you need to do next.
Don't lose your key!For all practical purposes, the credentials we give you are a password. Only share them with people who need to access your Encompass instance! If your credentials are lost or stolen, contact us and we'll help you replace them.
Create an Ocrolus persona
You can manage your Ocrolus connection and its permissions by creating a dedicated Encompass persona. Here are the steps for that:
- Navigate to the Encompass Settings menu.
- Expand the Company/User Setup section.
- Select the Personas menu.
- Duplicate the Administrator persona.
- Rename the duplicated persona to something that makes sense to you. For this guide, we'll name it Ocrolus API - Administrator.
Note:
The Subscribe to Webhooks setting must be checked for the Ocrolus API Persona. To learn more about this, click here.
See the Encompass user guide for more details.

Ensuring desktop and web/mobile access
In order for the Ocrolus user to access your Encompass instance via APIs, the applied persona must be set up with permission to access the web version of Encompass.
On the Personas settings page, select the Access tab for the newly created Ocrolus API - Administrator persona. Further, select the **Both desktop and web versions of Encompass…**radio button and then click the Save icon.
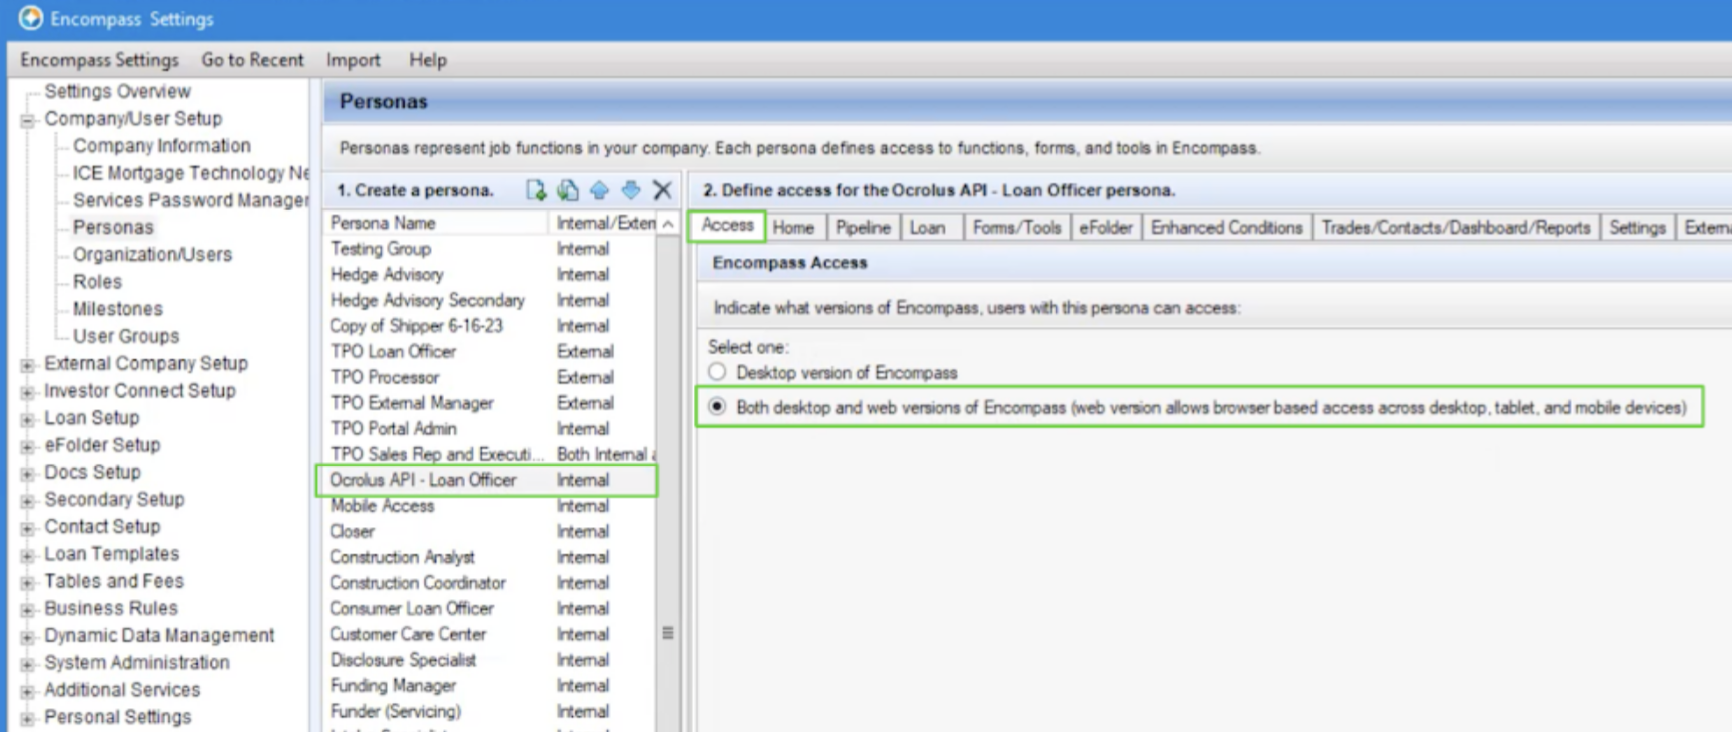
NoteIn some instances, this radio button may also be labeled as “Both Microsoft Windows Encompass Client and Encompass Mobile…”.
Configuring the Ocrolus persona
You'll need to configure your new Ocrolus persona with access to your eFolder and the document management controls. Select the eFolder tab and adjust the settings as follows:
| General | Unprotected Documents | Protected Documents |
|---|---|---|
| Create/Duplicate Documents Manage Access to Documents Remove Access From Protected Roles Send Consent Request Borrower Documents Request ICE Mortgage Technology Network Services eDisclosuers Add Additional Docs Move Docs Up/Down Deselect Docs Retrieve Borrower Documents Retrieve ICE Mortgage Technology Network Services Send Files | Edit Document Edit Document Details Create New Document Name Add Comments Browse and Attach Scan and Attach Attach Encompass Forms Attach Unassigned Files Move File Up/Down Edit File Merge Files Split File Remove File from Document Make File As Current Version Make Status As Reviewed | Edit Document Edit Document Details Create New Document Name Add Comments Browse and Attach Scan and Attach Attach Encompass Forms Attach Unassigned Files Move File Up/Down Edit File Merge Files Split File Remove File from Document Make File As Current Version Make Status As Reviewed |
NoteIn some instances, it may be required to enable the same permissions for Protected Documents which are applied for Unprotected Documents.

Create an Ocrolus API user
Now that you've got an Ocrolus persona set up, we'll create a new user and assign this persona to it. Here's how you can do that:
- Navigate to the Encompass Settings menu.
- Expand the Company/User Setup section.
- Select Organization/Users
- Click the Add User button on the user list. Configure the new user as follows:
- Check the API User box.
- Add Ocrolus API- Administrator as a user or enter a User ID that makes sense to you.
- Enter the API Client ID provided by Ocrolus.
- Enter a First Name, Last Name, and Email that make sense to you.
- Add the persona that you previously created to the Personas section.
- Set the Working Folder to Pipeline.
- Enable the Access to all loans in the same level setting, and grant Edit access.
- Enable the Edit Subordinates' Loans setting.
- Close the window with the Save button.
Note:
Ocrolus requires access to all loan folders for all organizations where loans are expected to leverage Ocrolus Automation.

Validate subordinates’ loan configuration
After the working folder has been updated, please ensure that the Ocrolus API user is able to access subordinates’ loans. This can be done as follows:
- Access the User Details page for the Ocrolus API account.
- Ensure Access to all loans in the same level is checked.
- Check Edit.
- Ensure Edit Subordinates’ Loans’ is checked.
- Select Save.
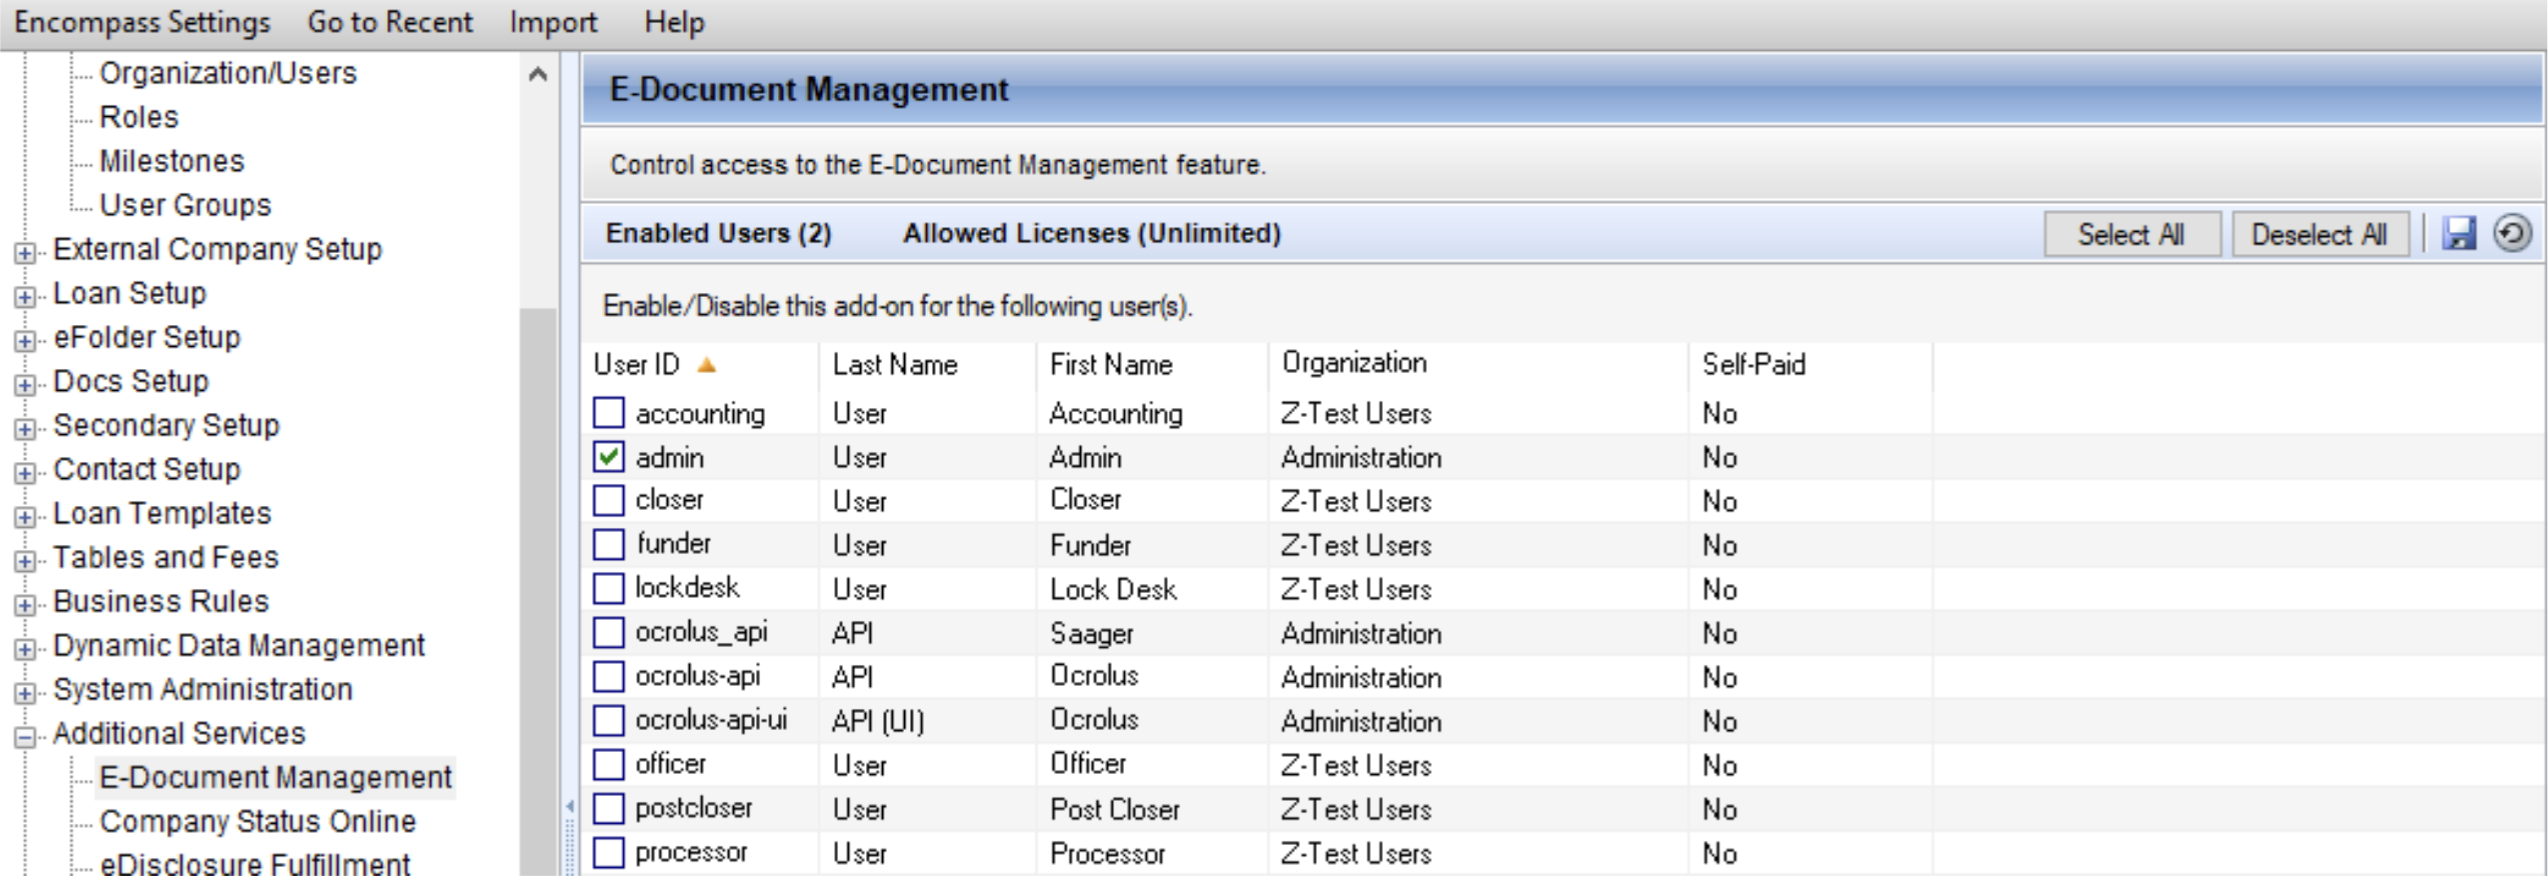
Provide e-document access to the user
-
Select Additional Services
-
Select E-Document Management
-
Check the box next to the user ID you created earlier.
-
Save your settings.
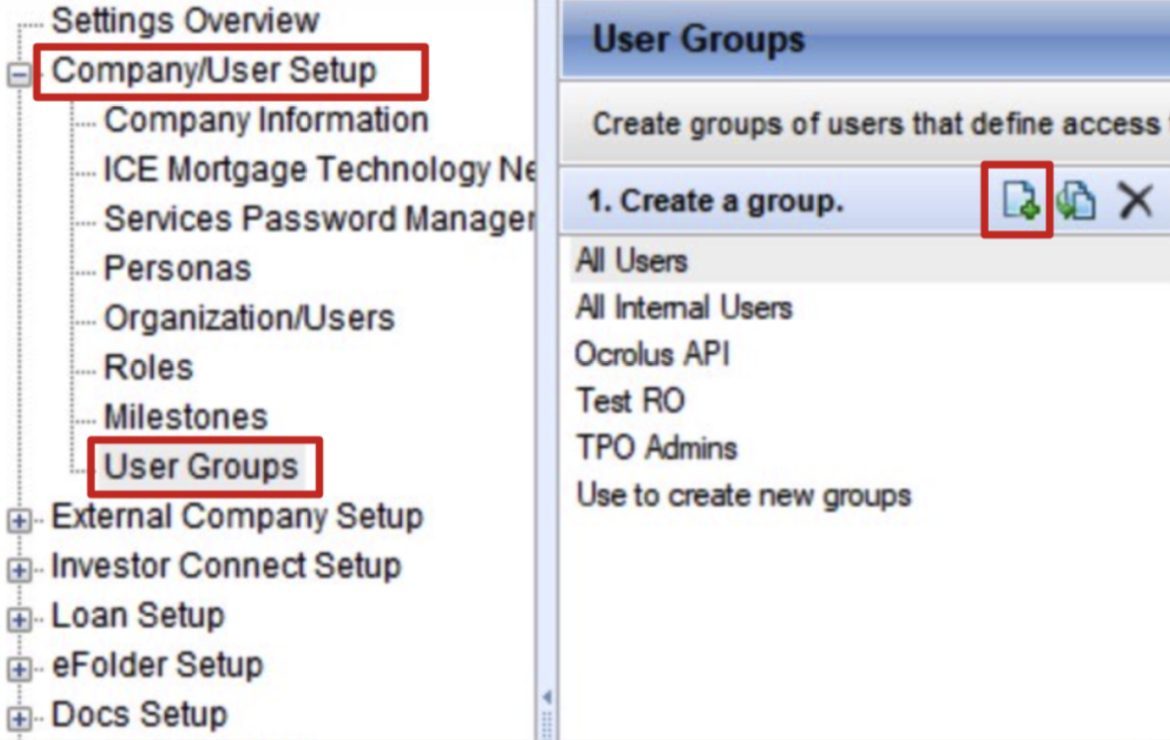
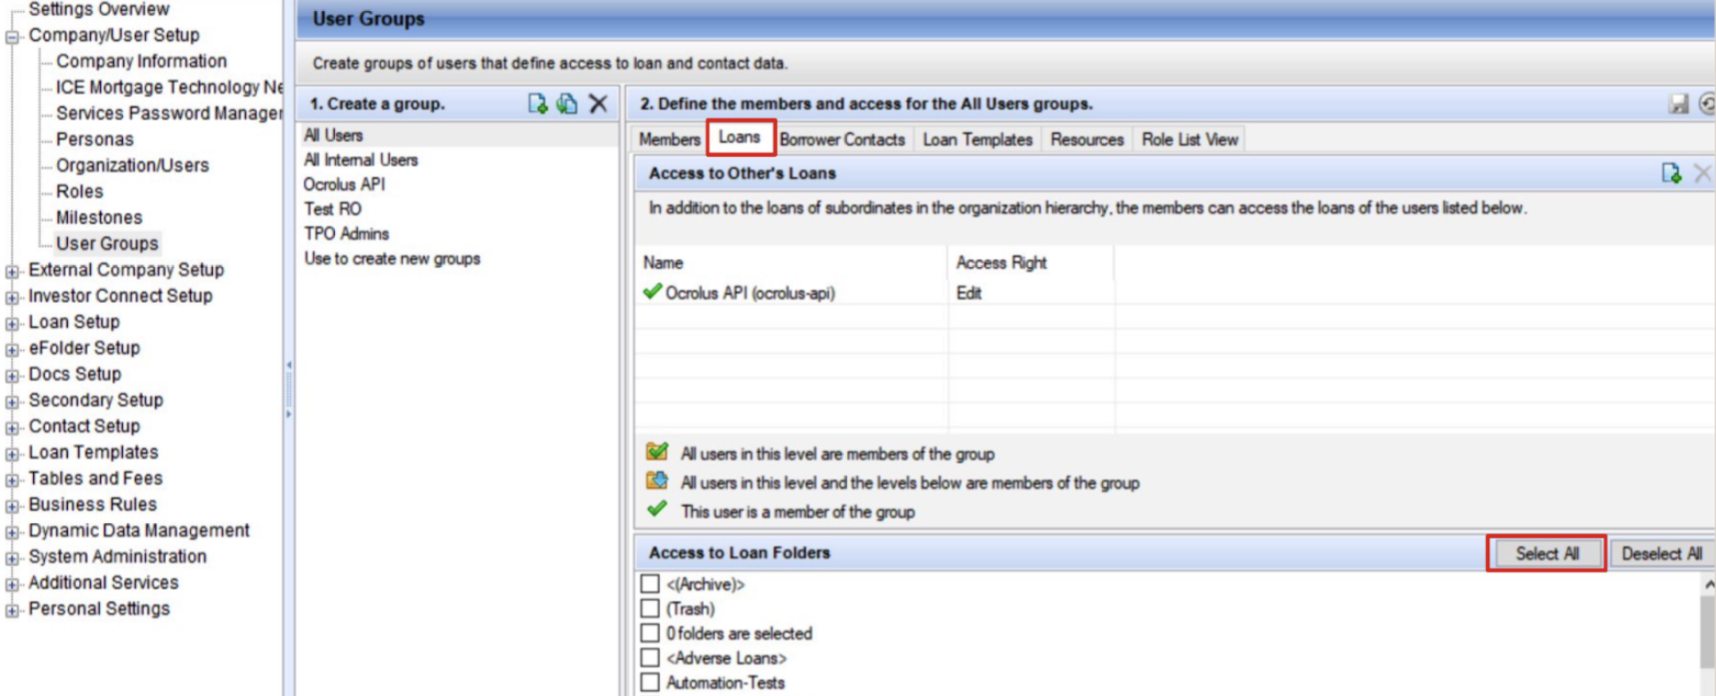
Grant user group access to loans
You need to create a user group and ensure that it has access to the appropriate loans. Perform the following steps to grant User Group access to loans:
-
Expand the Company/User Setup menu and select User Groups option.
-
Select the plus sign (+) to create a new group and name it Ocrolus API.
-
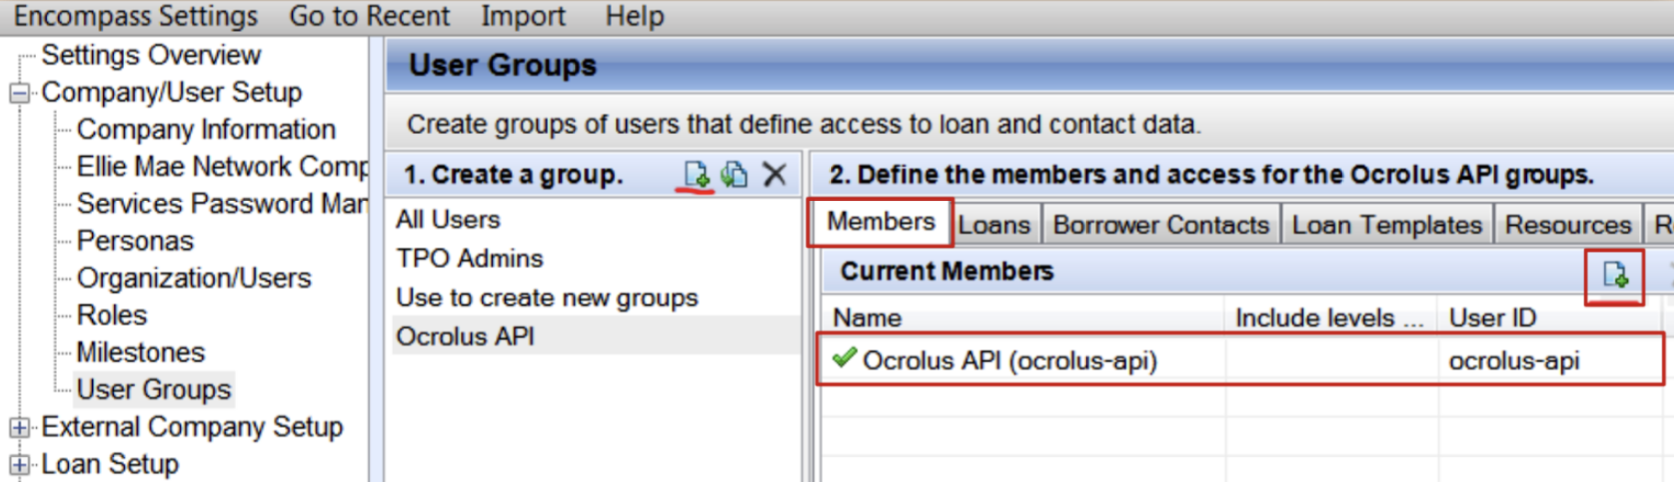
Select the Members tab and use the dialogue to add the Ocrolus API user.
-
Select the Loans tab and verify that the loan folders are included using which applications will be sent. It is recommended to simply grant access to all folders.
Ocrolus setup
Once the Ocrolus API account has been created and configured, contact your Ocrolus account team to acquire an account in the Ocrolus system.
Updated 2 months ago