
Transactions section
The Transactions page offers an in-depth view of a borrower's cash flow and financial health and shows all transactions within the Book along with their respective transaction tags. Here you can search for specific transactions or keywords, filter and sort transactions, and configure transaction tags to suit your analysis needs. Additionally, you can view captured data, include or exclude transactions from revenue calculations, and add comments to individual transactions for more detailed record-keeping and analysis.
The table below outlines the available fields in the Transactions table, along with their corresponding descriptions:
| Field | Description |
|---|---|
| Date | Date of the transaction |
| Description | A brief description of the transaction |
| Amount | Amount of the transaction |
| Revenue | The toggle shows a Yes or No label beneath it. This setting determines whether a transaction will be included in the calculation of income/revenue. The transaction is included when toggled ON (blue and to the right). When toggled OFF (gray and to the left), the transaction is excluded. Any updates made here will be reflected in the Accounts page in addition to any data that is exported. |
| Tags | Use the inline ✎ Edit tag control in the cell to change tags without opening the row. It shows the transaction tags that are generated by our proprietary enriched transactions algorithm. To know more about transaction tags and their definitions, see Ocrolus analytics data dictionary. |
| Account | The account in which the transaction occurred |
| Counterparty | When it is available, the counterparty is involved in the transaction |
| Comments | Space to allow a comment added by a member of the organization |
| Starred | A transaction that is marked for future reference |
The default column order follows a standard bank-statement layout, Date, Description and Amount first, then the Ocrolus-derived columns. When you hide a column, the remaining columns resize to fill the space.
Each column on the Transactions page is also filterable by clicking on All underneath the column headers and selecting your desired values.
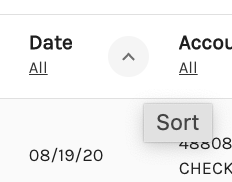
Certain columns are sortable by clicking on the “^” next to the column header. Columns that are currently sortable are Date and Amount.
Searching, filtering, and sorting transactions
The Transactions page allows you to search for transactions or keywords using the search bar, with results filtering automatically as you type. Additionally, you can filter by date, tags, or specific column values, and sort by date or amount for a more refined view.
Transaction type tabs
A tab strip above the table filters transactions by type: All, Revenue, Credits, Debits, and Starred. One tab is active at a time, with All selected by default. The active tab combines with any additional filters you apply.
Searching transactions
Search by transaction name or description using the search bar at the top of the Transactions page. The field is labeled Search by name or description. As you type, the table will automatically filter and auto-suggest the transactions to match the entered text.
Applying date range
You can use the DATE filters next to the search bar to include transactions based on the specific date range.
To apply the date range, perform the following steps:
-
Click on the DATE option.

-
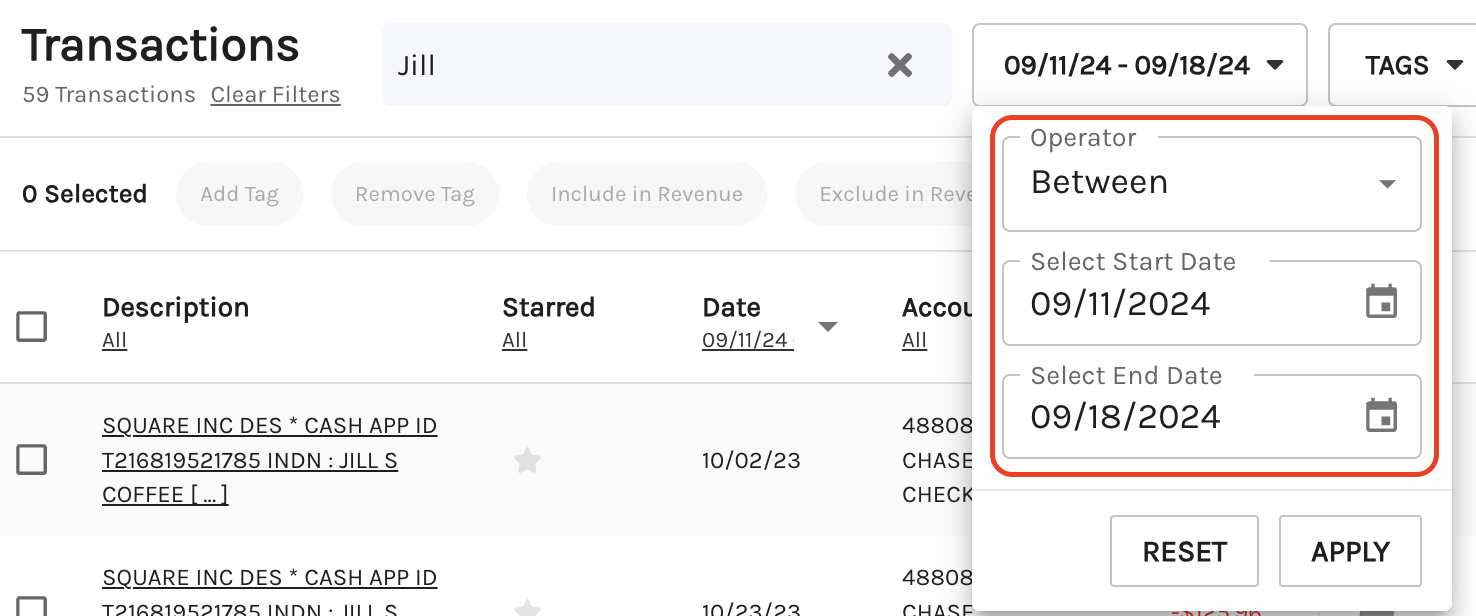
Choose the appropriate Operator from the dropdown list. Depending on the selected Operator, the subsequent options will change. The available Operators include:
Between
Select this option to include transactions that occurred within a specific date range. When selected, the Select Start Date and Select End Date fields appear. Enter the start and end dates and the system will calculate only the transactions that fall within the specified range.
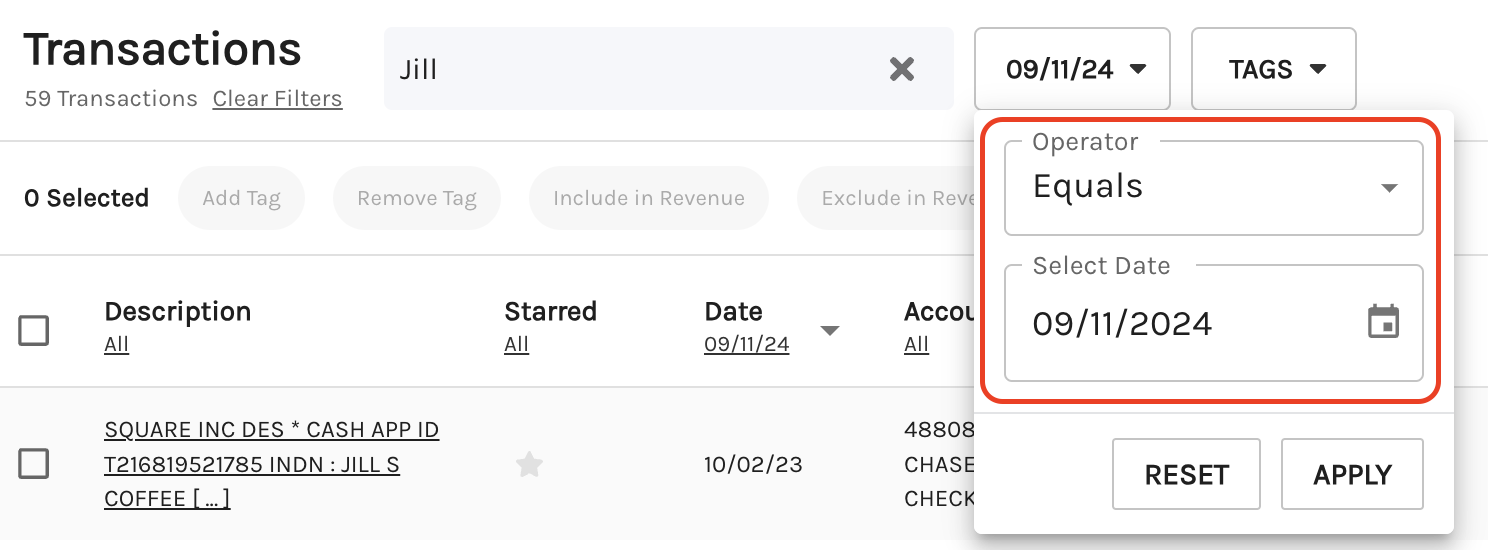
Equals
Select this option to include transactions that occurred on a specific date. When selected, enter the desired date.
-
Click on the APPLY button.
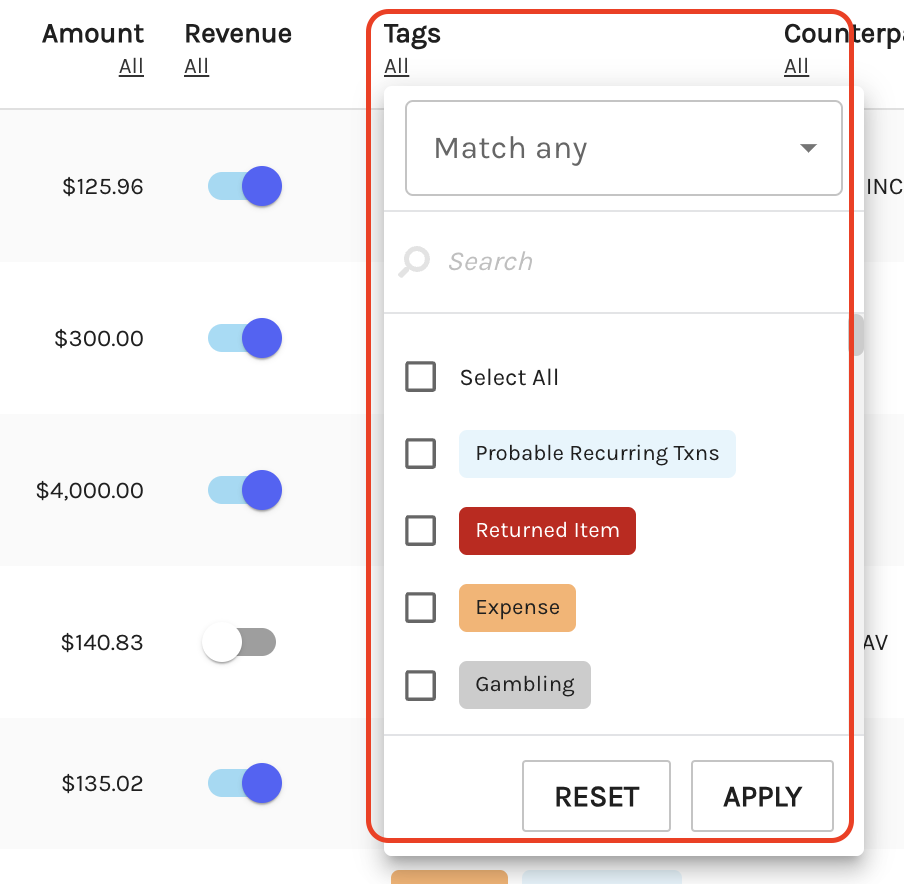
Applying tags
You can use the TAGS to include and exclude certain types of transactions.
To add/remove tags, perform the following steps:
-
Click on the TAGS option.
-
Choose the appropriate option from the dropdown list. The available options include:
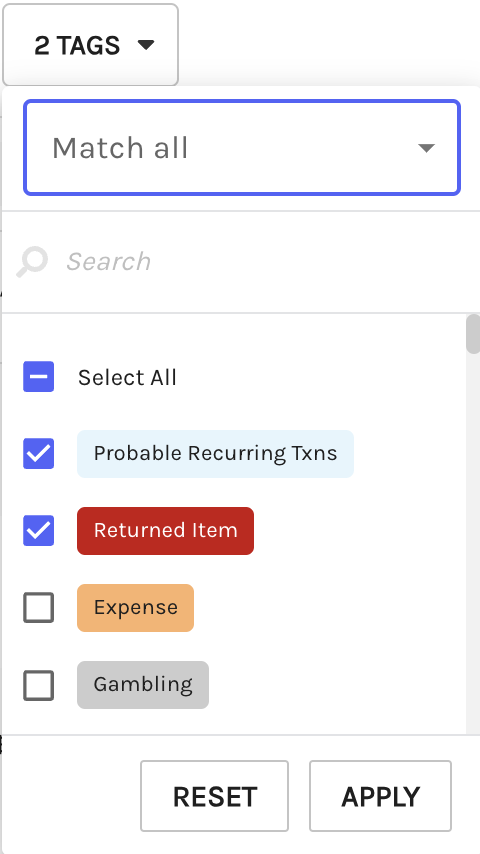
Match all
Select the required tag(s). The system will include a transaction only if it meets all the selected criteria.
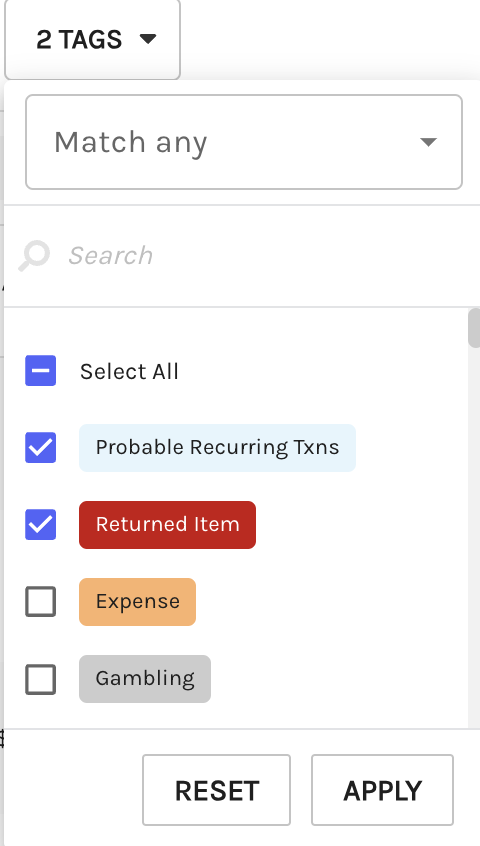
Match any
Select the required tag(s). The system will include a transaction if it meets at least one of the selected criteria. If a transaction satisfies any of the conditions, it will be included.
-
Click on the APPLY button.
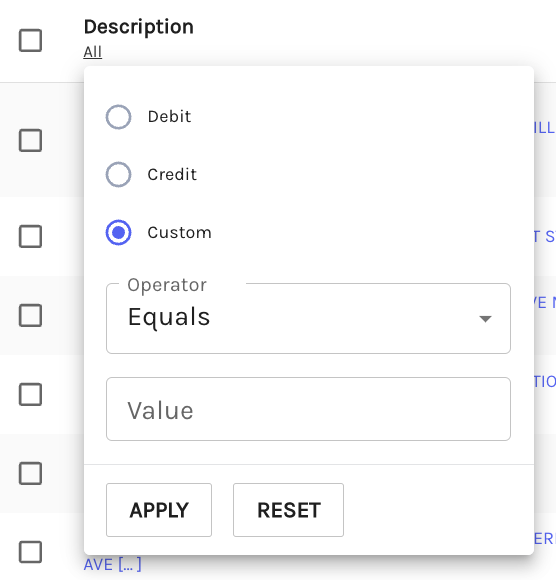
Filtering with the filter modal
Click the Filters button (≡) to open the filter modal and build multi-condition filters. Each condition follows a Field / Operator / Value format, and you can filter by Amount, Revenue, Counterparty, Date, Account, or Description.
All conditions combine with AND, meaning a transaction must meet every condition to appear in the results. When filters are active, the Filters button shows a count badge so you always know how many conditions are applied.
Once you're done building your filter:
- Click Apply filters to commit the conditions
- Click Cancel to close without applying
- Click Clear all to reset and start over
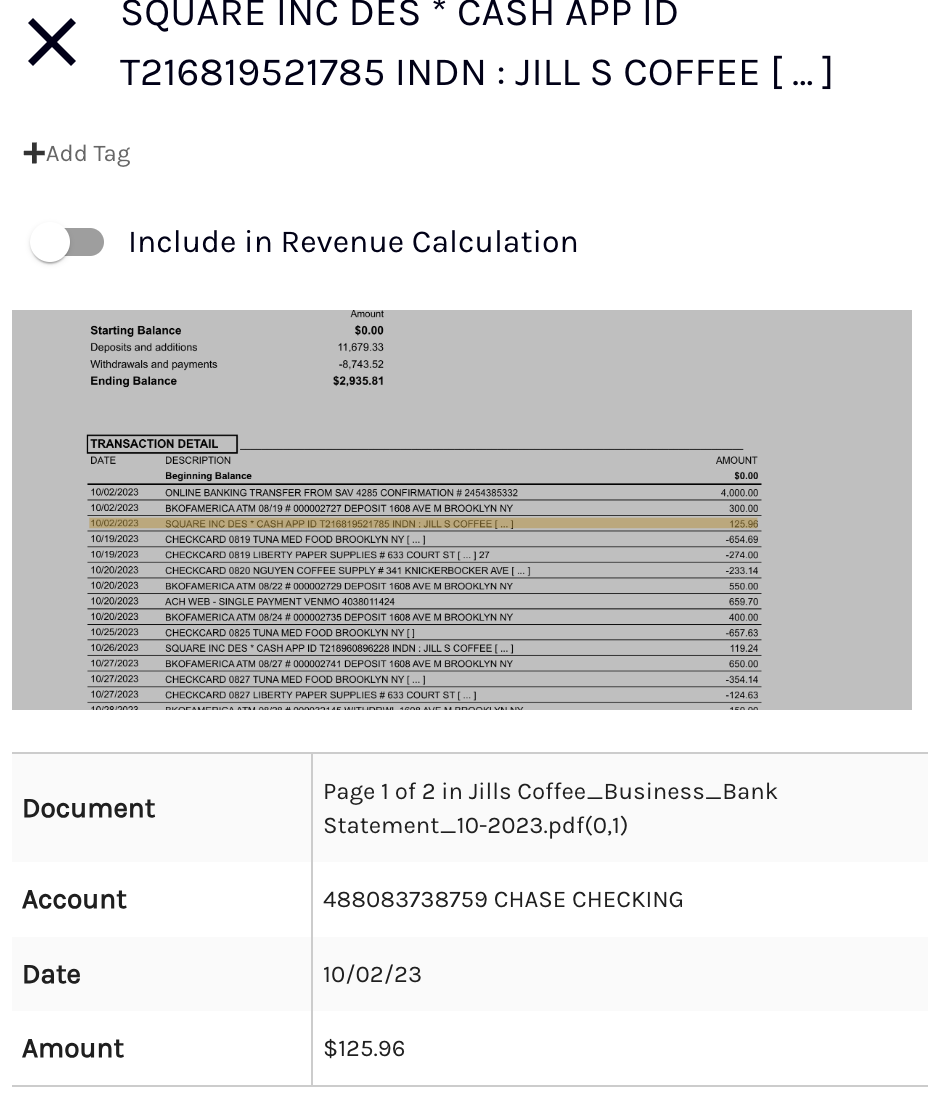
Viewing transaction details
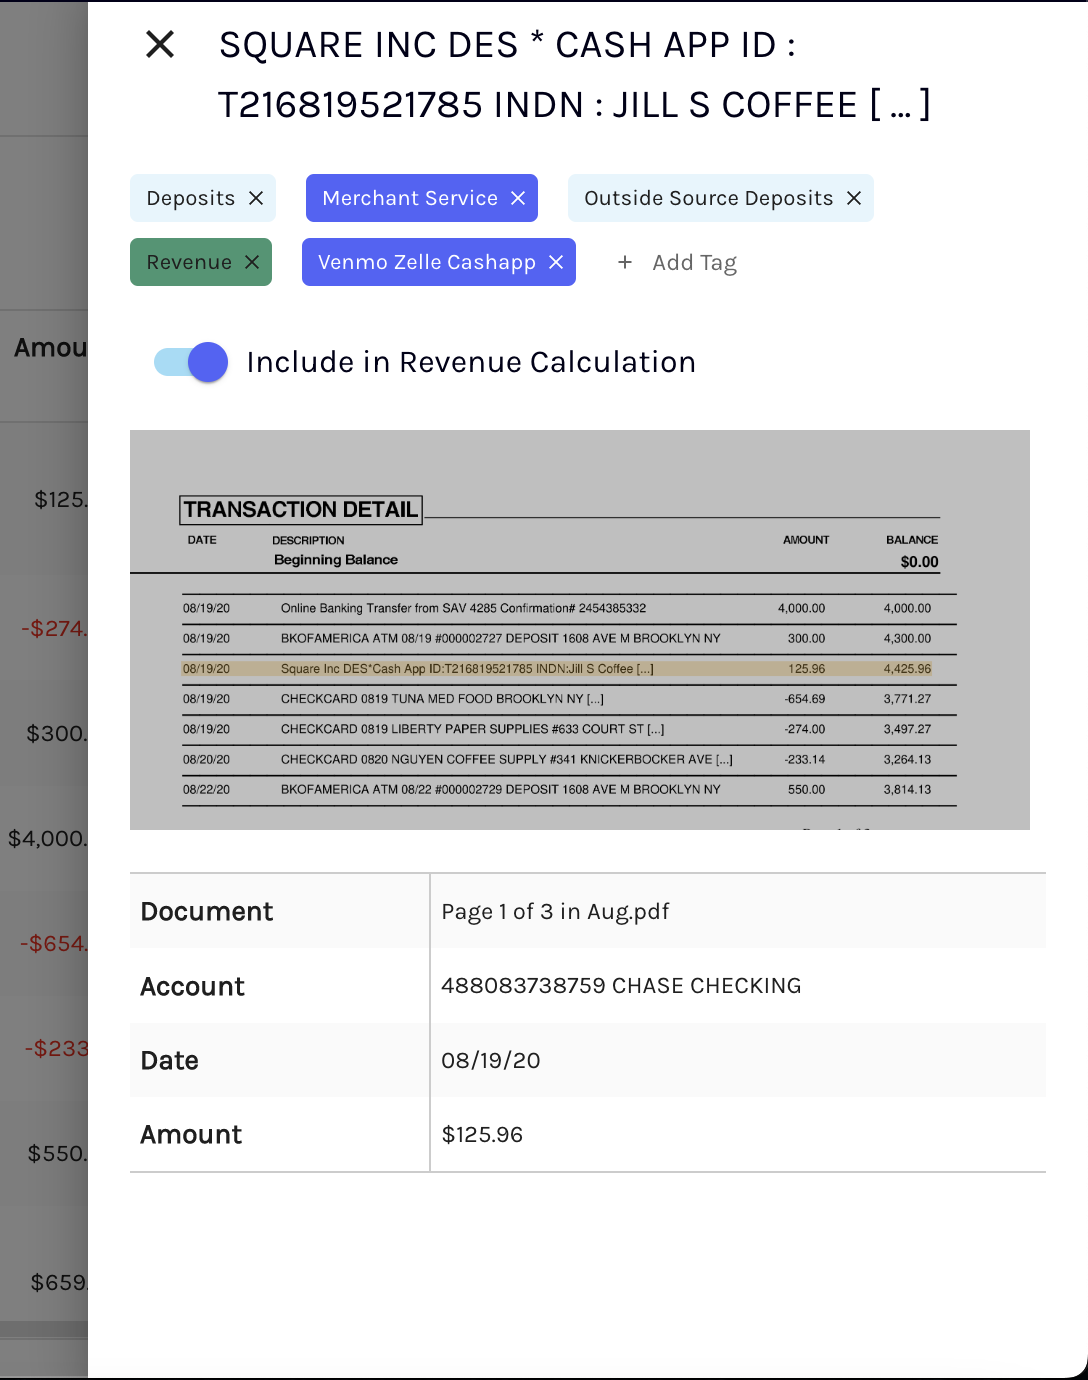
You can click on a specific transaction to view detailed information about that transaction in the Capture Details panel that appears on the right side of the screen. This panel provides key information, including the transaction description, editable transaction tags, and editable revenue calculation status.
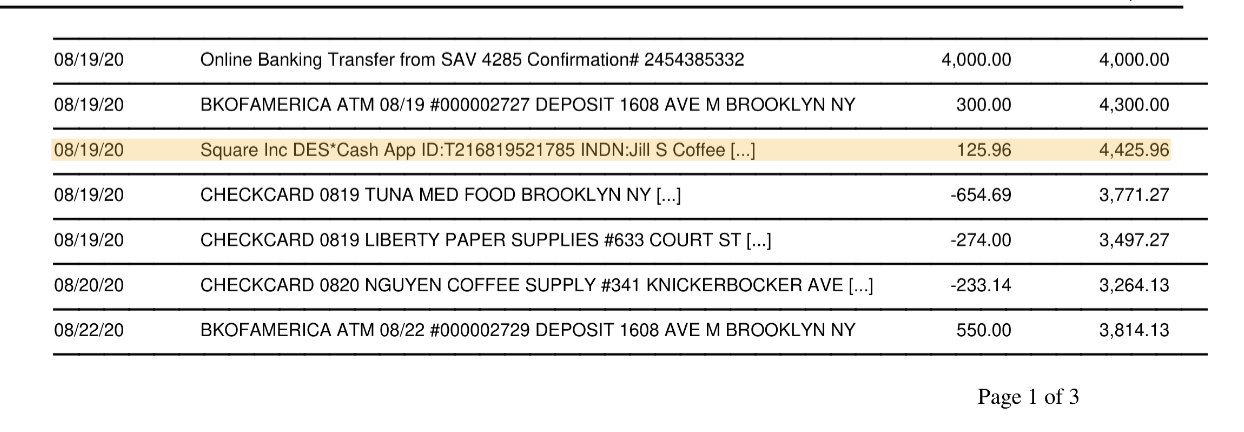
Additionally, it displays capture details and an image of the original document where the transaction occurred, with the transaction highlighted in yellow.
Updating transaction details
Ocrolus' proprietary transaction tagging algorithm is designed specifically for lenders and is based on a vast number of data points received daily. However, there may be instances where you want to adjust how a transaction is tagged.
Tags column
Select or deselect tags directly from the Tags column inline in the transactions table.
Capture Details panel
Make changes in the Capture Details panel for a more detailed view of the transaction.
Bulk Action
Use the Bulk Action feature to update tags across multiple transactions at once.
Inline edit
Use the inline ✎ Edit tag control directly in the Tags column to make a quick single-field update without opening the panel.
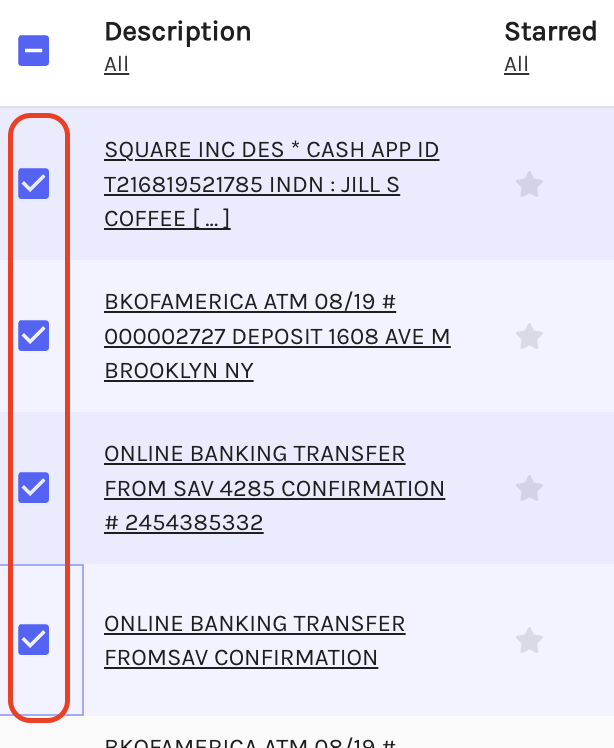
Updating transactions in bulk
To update multiple transactions at once, select the transactions by clicking the box on the left side of the Transactions screen. After selecting, the following actions will appear at the top of the page:
- Add tag: Adds tags to all selected transactions.
- Remove tag: Removes tags from all selected transactions.
- Include in revenue: Includes the selected transactions in income/revenue calculations. Updates made here will be reflected on the Accounts page and in any exported data.
- Exclude in revenue: Excludes the selected transactions from income/revenue calculations. Updates made here will be reflected on the Accounts page and in any exported data.
- Export Selected: Exports details of the selected transactions in .xlsx format.

Managing tags
To create custom tags or edit system tags, see the Tag management page.
Updated 8 days ago