Encompass Integration - API
Connect Ocrolus with an ICE instance
To provide Classify and Capture support for common mortgage form types, integrate Ocrolus with your ICE Encompass Instance.
- The Lender supplies Ocrolus with the Encompass lender client ID (e.g. 30112…) and the lender client instance ID (e.g. BE112…). To avoid delays in lower environment testing, it is standard for Ocrolus to ask the Lender for UAT and Production keys simultaneously.
- Ocrolus emails ICE to receive an API User key and secret.
- Ocrolus provides the API User Client ID (not the client secret) and account email address to the Lender. Requesting a client instance ID can take 3-5 business days.
- The Lender adds the API User client ID as an API user in Encompass. For Information about how to complete this step, see "Add API user Client ID as an API User".
Set up an Ocrolus persona
After Ocrolus provides the API user client ID to the client Encompass Administrator, create a new persona within the client lender instance. The persona allows granular control of Ocrolus API's permissions.
- Access Encompass Settings.
- Expand Company/User Setup.
- Select Personas.
- Duplicate the Loan Officer persona.
- Rename the duplicate Loan Officer persona as “Ocrolus API - Loan Officer”.

The above image shows the location where you create the Ocrolus API - Loan Officer persona.
Provide eFolder access to an Ocrolus API persona
After creating the "Ocrolus API - Loan Officer" persona, grant the persona access to the eFolder and Document Management Controls.
- Select the eFolder tab.
- On the General tab, select “Manage Access to Documents”.
- Select “Edit Document Details” and “Create New Document Name” in Unprotected Documents.
- Select “Edit Document Details” and “Create New Document Name” in Protected Documents.
- On the LO Connect tab, confirm access to LO Connect Mobile.
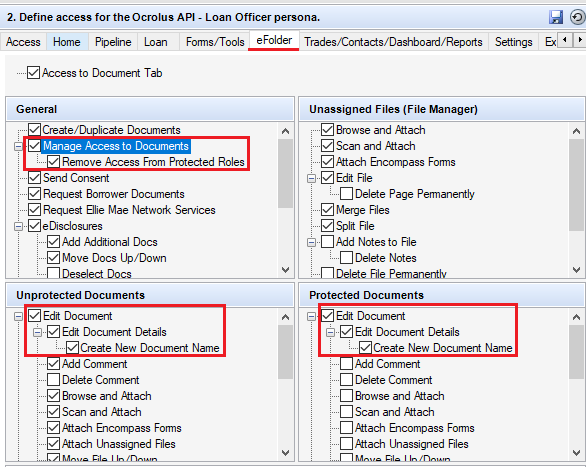
The above image shows the location where you manage Ocrolus API - eFolder access.
Add API user Client ID as an API user
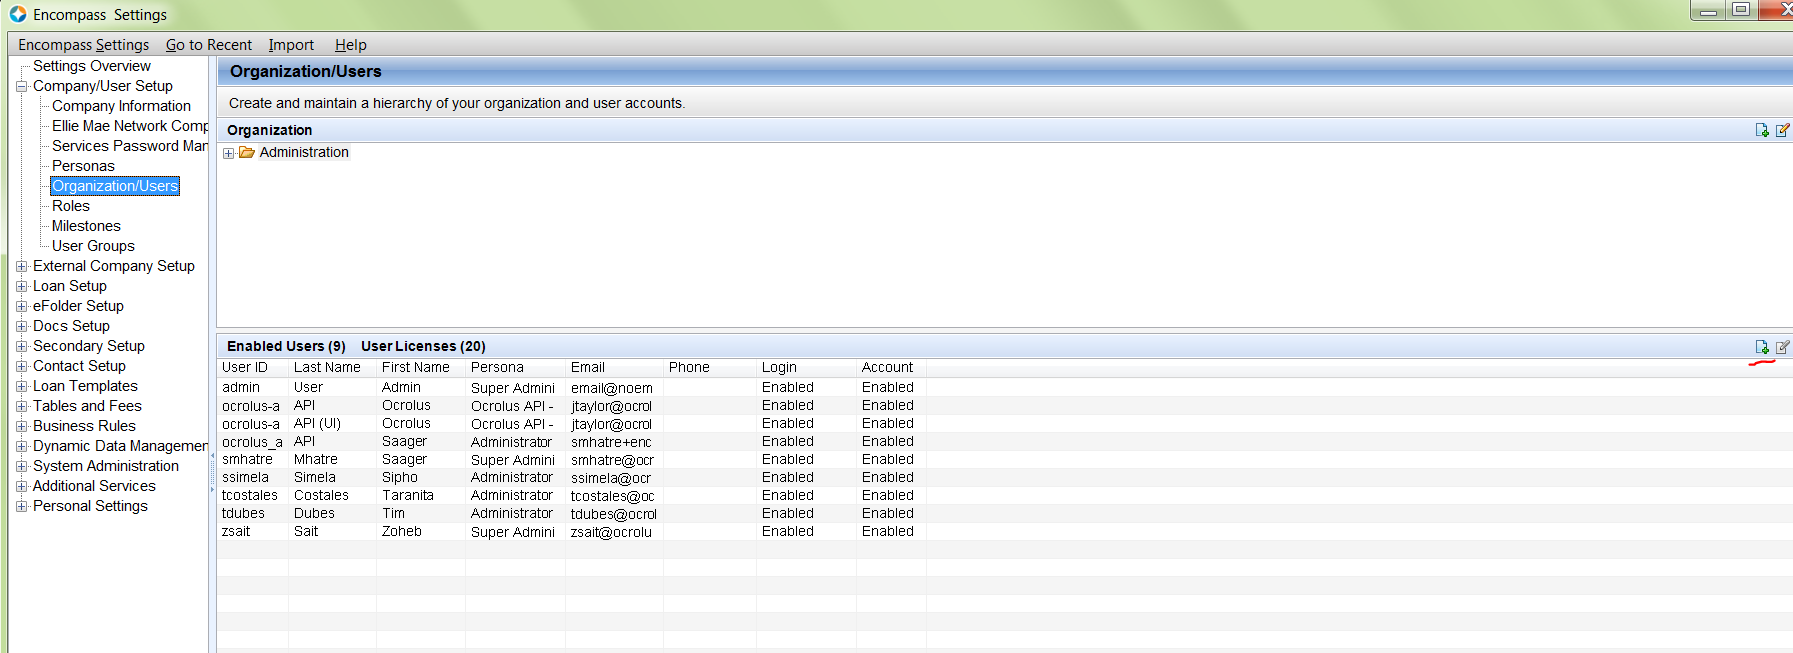
In the client, add the “Ocrolus API- Loan Officer” as a user using the email and clientId from Ocrolus.
- Check the API user box.
- Add “Ocrolus API- Loan Officer” as a user.
- Add the email and clientID from Ocrolus.
- Change the Working Folder to “Pipeline”.
- Click Save.
The above image shows the location where you add a user in an Encompass instance.
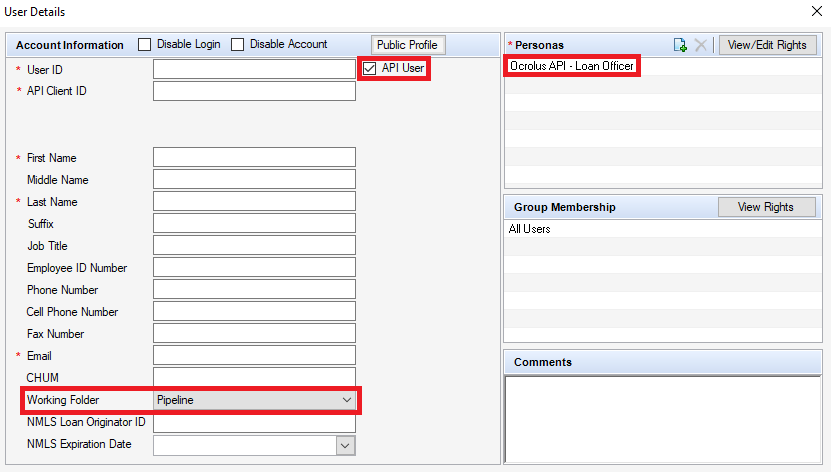
The above image shows the interface where you add the Ocrolus API user.
Access subordinate loans
After uploading the working folder, ensure that the Ocrolus API user can access the subordinate loans.
- Access the user details page for the Ocrolus API account.
- Ensure ‘Access to all loans in the same level’ is checked.
- Check ‘Edit’.
- Ensure ‘Edit Subordinates’ Loans’ is checked.
- Click Save.

The above image shows the proper settings for Subordinate Loan Access.
Provide E-Document user access
To grant Ocrolus access to E-Documents, perform the following steps:
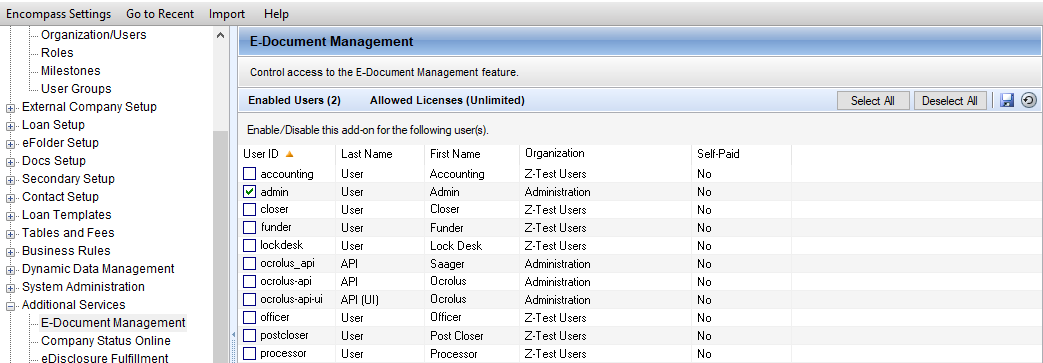
- Select Additional Services.
- Select E-Document Management.
- Check the box beside user ID.
- Click Save.
The above image shows the interface where you add the Ocrolus API user to E-Document Management.
Grant user group access to loans
Create a user group and verify it has access to the appropriate loans.
- Select Company/User Setup.
- Select User Groups.
- Select the plus sign to create a new group and give it a title.
- On the Members tab, use the dialogue to add the Ocrolus API user.
- On the Loans tab, verify the loan folders for sending applications are included. We recommend that you grant access to all folders.

The above image shows how to create a User Group.
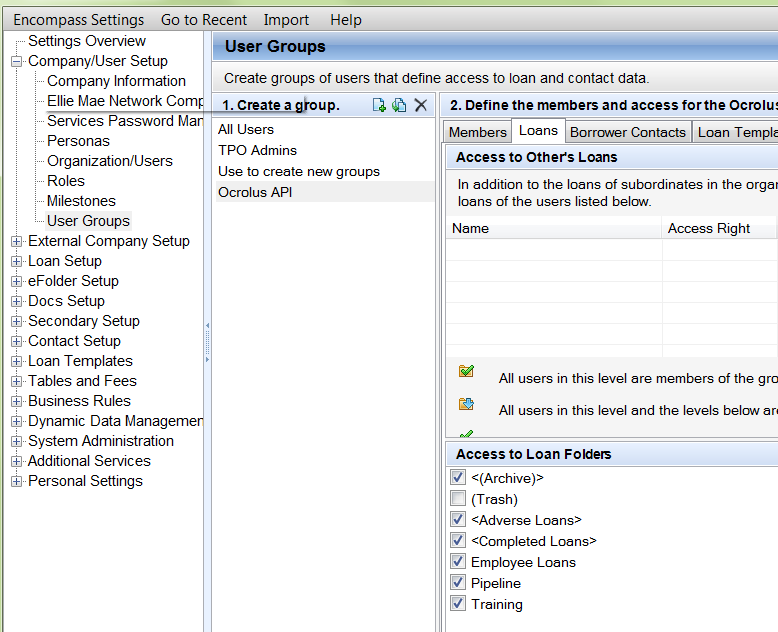
The above image shows the folders that Ocrolus should have access to.
Updated over 1 year ago
After Ocrolus set up has been completed, the Classification component of the Integration can be executed on. Information of Classification integration can be found here